Sonntag, 27. Dezember 2009

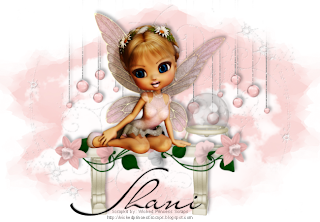
Whispered Pixie


This tutorial was written by and copyrighted to Seven on 27th December 2009.


For this tutorial you will need:

- Wicked Princess Scraps' PTU-kit Whispered Pixie which you can purchase here
- A fairy tube of your choice (I used the one which came with the kit)
- Mask of choice (I used WSL_Mask220 which you can get here)
- a font of your choice (Mr Lackboughs)


Let's begin

- Open a new canvas 650x450 px.

- Copy and paste a paper or fill it with colour of your choice.
Apply the mask on it.

- Copy and paste pixieflourish, resize and move it to the left side.
Duplicate this layer and mirror it vertical and horizontal.
Add a small and soft dropshadow.

- Copy and paste the cloud and resize if necessary.

- Copy and paste dangle.
Resize it and move it bit to the top.
Erase with a soft eraser parts of the string.

- Copy and paste the bench.
Resize and dropshadow it.
Move it a bit to the down.

- Copy and paste pansy and resize it.
Arrange it on the side of the bench.
Add a dropshadow.

- Copy and paste daffodill and resize it very small.
Move it to the left side of your bench.
Duplicate this layer and mirror it vertical.
Add dropshadow.

- Copy and paste ball.
Resize it and position it to the right on your bench.
(It should stand on it)
Add a smal dropshadow.

- Copy and paste your fairy.
Resize and move it in the middle of the bench.
She should sit or lie on it.
Add a dropshadow to her.

- With a nice font write your name on your tag and dropshadow it.

- At least you just need to add copyright infos and save as.

This was easy, or?

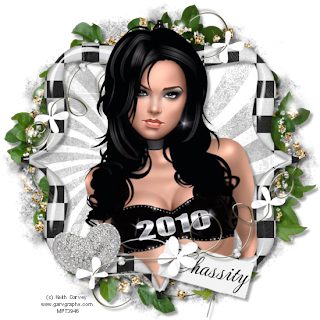
2010


This tutorial was written by and copyrighted to Seven on 27th December 2009.


For this tutorial you will need:

- Chassity's FTU-kit Bling In The New Year which you can download here
- A tube of your choice (I used an amazing tube of Keith Garvey which you can purchase at MPT)
- Mask of choice (I used WSL_Mask75 which you can get here)
- a font of your choice (I used MeaCulpa)


Let's start:

- Open a new canvas 550x550 px.

- Copy and paste a paper of your choice and apply the mask.

- Copy and paste frame2 and resize if necessary.

- With you magic wand click inside the frame and expand the selection about 6px.

- Copy and paste a paper of your choice and invert the selection.
Press delete.
Selection none.

- Dropshadow your frame.

- Copy and paste element22 and move it to the left.
Move this layer under the frame/paper layer.

- Duplicate the leafes 3 times and postion every leaf so that on every side of the frame is a part of them. (see my tage above for help)
Merge those 4 layers together and add a dropshadow.

- Copy and paste frame5, resize if necessay and add dropshadow.

- Highlight your frame2 layer.

- Copy and paste your tube.
Resize if necessary and add a dropshadow.
Erase parts of the body which are looking throught the frame.
She should be in the frame but the head should be over the frame.
(see my tag for help)

- Copy and paste element7 and resize it.
Move it to the right.

- Duplicate this layer and mirror it vertical and horizontal.
Move this duplicated layer under your tube layer.

- Dropshadow them both.

- Copy and paste element4, resize and rotate it a bit.
Move this layer under the element7-layer and postion it to the left.
Add a dropshadow.

- Copy and paste element10, mirror it horizontal and vertical.
Resize it and add a drpshadow.
Move it also under the element7-layer.
The knot of its string should be under one of the paper-flowers.

- Write your name or text on the tag.

- At least just add copyright infos and save as.

Ready ♥


Freitag, 25. Dezember 2009

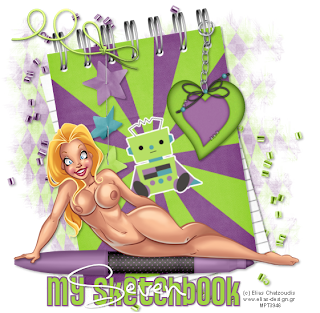
My Sketchbook *AC*


This tutorial was written by and copyrighted to Seven on 25th December 2009.


For this tutorial you will need:

- My PTU-kit My Diary which you can purchase here
- A lying tube of your choice (I used a totally sexy tube of Elias Chatzoudis which you can purchase at MPT)
- Mask of choice (I used WSL_Mask297 which you can get here)
- 2 fonts of your choice (I used Pussycat and LunaBar)


Let's start:

- Open a new canvas 600x600 px. You can resize it later.

- Copy and paste a paper of your choice and apply the mask.
Merge the mask layer.
Reduce the opacity to 60%.

- Copy and paste one of the beads (bead_05, _06, _07 or _08), resize it and dropshadow it.
Move it to the left upper side.

- Copy and paste another one of the beads, resize and dropshadow it.
Mirror it vertical and horiontal.
Move it to the right lower side.

- Copy and paste one of the note books (block_03) and resize it if necessary.
Rotate it a little bit of your choice.

- Copy and paste one of the stickers (sticker_01, _02, _03 or _04) and move it in the middle of your notebook.
Don't forget to resize and rotate it.

- Copy and paste one of the keychains, resize and move it to the right ring of the notebook.
Erase some parts of the keychain ring so that it looks if it woul hand on it.
(see my tag above for help)
Add a dropshadow.

- Copy and paste one of the bows, resize it and move it to the top on the rings of the book.
Dropshadow it.

- Copy and paste the star string and resize it.
Move this layer under the bow layer and add a dropshadow.

- Copy and paste one of the marker, resize if necessary and add a dropshadow.
Move it to the lower part of your book.

- Copy and paste your woman tube and arrange it on the marker.
She should lying on it.
Dropshadow her.

- Choose a background and a foreground colour and a fat font (Pussycat) write your text and dropshadow it.

- Close the foreground colour and choose a light background colour and you written font (LunaBar).
Write your name over your bigger text and give it a small dropshadow.

- At least you just need to add copyright/watermark infos and save as.

Hope you liked it!

Mittwoch, 23. Dezember 2009

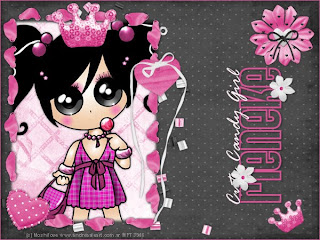
Cute Candy Girl


his tutorial was written by and copyrighted to Seven on 22nd December 2009.


For this tutorial you will need:

-Rieneke's PTU-kit Black White Collection: Pink which you can get here
- A tube of your choice (I used a totally cute tube of Moshilove which you can purchase at MPT)
- 2 fonts of choice (I used Pussycat and Rage Italic)


Let's begin:

- Open a new canvas 600x450px.

- Select all.
Copy a paper of your choice and paste into the selection.
Selection none.

- Copy and paste a ribbon frame of your choice (frame1 or 2), resize and add a dropshadow.
Move it to the left side.

- With your rectangle selection tool draw a selection over the frame and add a new raster layer.
Copy a paper and paste it into the selection.
Move this layer under the frame layer.

- Copy and paste your tube and postion it into the frame.
Resize and dropshadow it.
Maybe you have to erase parts which are looking trough the frame.

- Copy and paste the beads.
Resize if necessary and dropshadow them.
Move them under the frame-paper layer.

- Copy and paste the crown, resize and dropshadow it.
Move it on the head of your tube, but over the frame.

- Duplicate this layer.
Resize it and rotate it a bit.
Move it into the right corner.

- Copy and paste different hearts and flower elements.
Decorate your tag with them.

- Choose a pink/dark font as forgreound colour (no background colour) and a fat font (Pussycat).
Write your name and rotate it about 90 degrees.
Dropshadow it.

- Close the forgreound colour and choose a lighter background colour and your handwritten font (Rage Italic).
Write a small text like Cute Candy Girl and rotate it also about 90 degrees.
Move it over your name.

- Decorate your name with two smaller elements.

- At least just add a 1px border and add copyright infos and save as.

Ready ♥


Mittwoch, 2. Dezember 2009

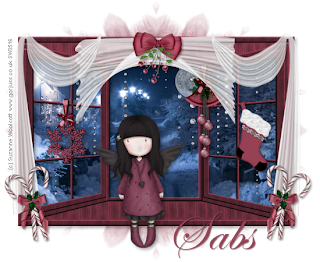
Awaiting Christmas


This tutorial was written by and copyrighted to Seven on 02nd December 2009


For this tutorial you will need:

- Sabs' Principessa -kit, which you can get here.
- A tube of your choice (I used the fabulous work of Suzanne Woolcott. You can purchase her stuff here.)
- A winter-night picture of your choice. (Mine is from stock.xchng)
- Mask of choice (I used WSL_Mask259 which you can get here)
- Font of your choice (I used Edwardian Script)


Let's start:

- Open a new canvas 550 x 450 px.

- Copy and paste a paper of your choice and apply the mask.

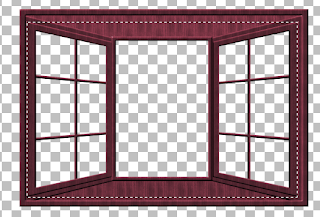
- Copy and paste the window (Window_01) and resize if necessary.
Dropshadow it.

- Use your rectangle selection tool and draw a rectangle so that the window parts are selected.
(click on image for larger view)


- Copy and paste your picture.
Invert the selection and hit delete.
Invert selection again.
Move this layer under the window layer.

- Copy and paste the glitter (BrilliantRain_01) and invert the selection again.
Press delete.
Selection none.
Add a small dropshadow.

- Copy and paste one of the moons, resize it and move it also to a nice place in your window.

- Highlight the window layer.

- Copy and paste the first curtain (Curtain_1) and resize it and move it in the middle of your window.
Copy and paste the other curtain (Curtain_02) and position it over your window.
(See my tag above for help)

- Copy and paste one of the bow ornaments (Ornament_05 or _06), resize it and move it in the middle of the head curtain.
Dropshadow it.

- Copy and paste other elements from your kit (I used a snowflake, bells and a stocking)
and decorate your window with them.
Don't forget to dropshadow them.

- Copy and paste one of the candy canes (CandyCane_01 or _02) and resize it.
Position it on the right side of your window over the curtain and dropshadow it.
Duplicate this layer and mirror it.

- Copy and paste your tube and arrange it on the ledge.
Dropshadow it.

- Choose your font and write your name or text on it.

- At least just add copyright and/or watermark infos and save as.

Ready ♥

Samstag, 28. November 2009

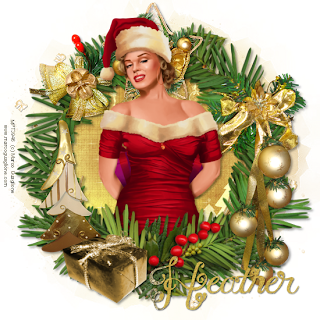
Golden Christmas


This tutorial was written by and copyrighted to Seven on 28th November 2009.


For this tutorial you will need:

- Candy Coated Scraps' PTU-kit Golden Holiday which you can purchase here
- A tube of your choice (I used the beautiful artwork of Marco Guaglione which was in the MPT christmas gift.)
- Mask of choice (I used Vix_Mask109 which you can get here)
- font of choice (I used MT Under Your Skin)


Let's begin:

- Open a new canvas 550x550px.

- Copy and paste a paper of your choice and apply the mask.
Duplicate this mask layer and merge down.

- Copy and paste the round wood frame (elem14) and resize if necessary.

- With your magic wand click inside of the frame and expand the selection about 10px.
Add a new raster-layer.

- Copy an other paper of your choice and paste it into the selection.
Selection none.
Move this layer under the frame layer.

- Highlight your frame layer and dropshadow it

- Copy and paste the wreath (elem42), resize and dropshadow it.

- Copy and paste your tube and arrange it in the frame/wreath.
Erase the parts of the body which are looking over the wreath.
(see my tag for help)
Dropshadow it.

- Copy and paste a star (elem68), resize it and move it on the top of your wreath (under the tube layer).
Add a dropshadow.

- Copy and paste the bells (elem67) and move it on your wreath to the left side.
Resize and dropshadow it.

- Copy and paste the balls (elem79), move it to the ride side, resize and dropshadow it.

- Copy and paste a golden tree (elem73) move it to the left, resize and dropshadow it.

- Copy and paste one of the presents (elem12) and arrange it in front of the tree.
Add a dropshadow.

- Choose a paper in your background color and write your name on your tag.
Dropshadow it.

- At least just add copyright and/or watermark infos and save as.

Ready ♥

Samstag, 14. November 2009

Sweet Winter Wishes


This tutorial was written by and copyrighted to Seven on 14th November 2009.


For this tutorial you will need:

- Bea's PTU-kit Christmas for a Princess which you can get here
- A tube of your choice (I used a totally sexy tube of Elias Catzoudis which you can purchase at MPT)
- 2 Masks of choice (I used WSL_Mask236 which you can get here and Vix_Mask306 which you can get here)
- font of choice (I used unchanges thoughts$)


Let's start:

- Open a new canvas 550x550 px

- Copy and paste a paper of your choice and apply WSL_Mask236.

- Copy and paste the paper again and apply VIX_Mask306.
Duplicate this layer and mirror it horizontal.

- Copy and paste deco03, arrange it and add a dropshadow.

- Copy and paste the ribbon frame (frame09).

- With your magic wand click inside the frame and expand the selection about 5px.

- Copy and paste a new paper and move it under the frame layer.
Invert the selection and hit delete.

- Copy and paste the ice (ice01) and move it a bit to the top.
Hit delete again.

- Copy and paste the star bling (bling01) and move it over the ice.
Hit delete again.

- Selection none.

- Add a dropshadow to your ice, bling and frame layer.

- Highlight your frame-layer.

- Copy and paste your main tube and move it a bit to the right.
Erase these parts of it so that it looks if your tube will come outside of the frame.
(see mine for help ;) )
Add a dropshadow.

- Copy and paste the bells (bells03), resize it a bit and move it over the knot to the right side.
Dropshadow it.

- Copy and paste the lollipop (candy03), resize it and move it over the knot to the left side.
Rotate it a bit and add a dropshadow.

- Copy and paste the candy cane (candy01), resize it and move it over the lollipop.
Add a dropshadow.

- Set your foreground colour to white and your background colour to a maching colour.
Write your name on your tag and add a small dropshadow.

- At least you just need to add copyright and/or watermark and save as.

Ready! ♥

Mittwoch, 11. November 2009

Glass Name Effect


This tutorial was written by and copyrighted to Seven on 11th November 2009.

Many people already asked me how I often made my glass-effect.
And today I'm going to tell you how to do it.
I got this effect from my friend Caro!
Thank you sooo much! ♥

I'm sorry that most of the previews are in German but I'm only the German PSP 9 Version.
But I think you can compare and rethink!


For this tutorial you will need:

- a fat font of your choice (I used Coolsville)
- Eye Candy 3.01 - Glass


Let's start!

- Choose a foreground colour or pattern and a matching background colour.

- Choose your textool and search for a fat font.

- Adjust your font size to a size for your liking and the pixel to two or 3, what ever looks like the best.
I added you a picture of my settings for my sample.
(click image to enlarge)


- Change the vector layer to raster layer

- Selection - All - Free - Not free

- Reduce the selection about one mor pixel than your pixel of the font foreground-colour.
For example if you used 3 as a pixel size to your font you have to use a 4 for your reducing of the selection.

(You can maybe also click with your magic wand inside of the font)

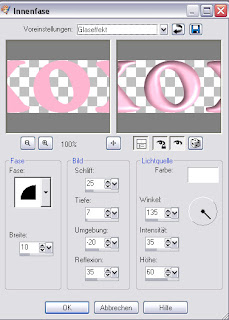
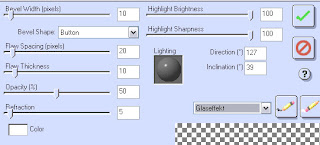
- Use the inner bevel with the following settings
(click image to enlarge)


- Apply your Eye Candy 3.01 - Glass plugin with the following settings
(click image to enlarge)


- Selections - none

- Add a nice dropshadow to your writing :)


This was easy, or?
Samstag, 24. Oktober 2009

BCA


This tutorial was written by and copyrighted to Seven on 24th October 2009.


For this tutorial you will need:

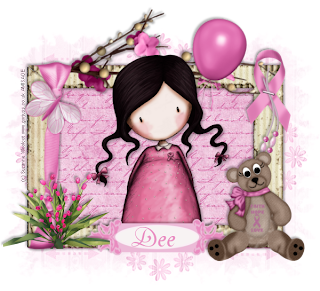
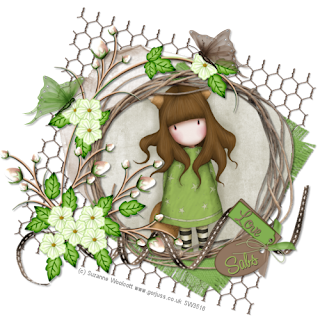
- Dee's part of the TNW BCA Collab-kit, which you can download here.
- A tube of your choice (I used a cute tube of Suzanne Woolcott which she sold at AMI. Now you can get her work at her own shop. )
- Mask of choice (I used flowerrectangle_MASK I don't know who created this so I can't supply it.)
- Font of your choice (I used Avalanche Script TT)


Let's start

- Open a new canvas 600 x 600 px.

- Copy and paste a paper of your choice and apply the mask.

- Copy and paste a frame (frame1) and resize it a bit.
Rotate it about 90 degrees to the right.

- With your magic-wand click inside of the frame and expand the selection about 5px.
Copy and paste a paper of your choice and move this layer under the frame layer.
Invert the selection and press delete.
Add a dropshadow to your frame.

- Copy and paste your tube and postion it over the frame.
Erase the part of the body of your tube which are looking over the bottom of the frame.
(see my tag for help)
Add a dropshadow to yoour tube.

- Copy and paste one of the bca-ribbons, resize and dropshadow it.
Move it to the right higher edge of the frame.

- Copy and paste one of the beaded strings, resize and dropshadow it.
Move it over the bca-ribbon.

- Copy and paste one of the butterflies. Resize and rotate it a bit.
Move it to the left side over the knot of the frame-ribbon and add a dropshadow.

- Copy and paste on of the tags (tag1 or tag2) and resize it.
Postion it in the middle of the lower part of your frame.
Add a small dropshadow.

- Copy and paste flower6, resize and dropshadow it.
Move it to the bottom of your frame on the left side.

- Copy and paste one of the bca-bears and resize it.
Move it to the bottom of your frame on the right side and add a dropshadow.

- Copy and paste one of the balloons.
Resize and rotate it.
Move this layer below your tube layer.
Dropshadow it.

- Write your name on the tag.

- Just add copyright information and/or watermark and save as.

Ready! ♥

Freitag, 23. Oktober 2009

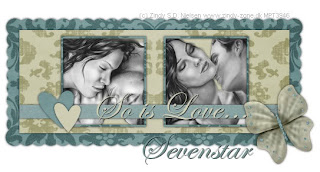
So is Love


This tutorial was written by and copyrighted to Seven in December 2008 and translated on 23th. July 2009


For this tutorial you will need:
- Scrapkit "A touch of elegance" by Yvette which you can download at Misfits Scraps
- Template "missy_tagtemplate41" which is downloadable on Missy's Blog
- 2 couple tubes of your choice. I used the fabulous art of Zindy S.D. Nielsen which I purchased at MPT. But now she's selling her stuff in her own shop.


Let's start

-
Open the template, duplicate it with CTR+D and close the orignal. On your duplicated canvas delete the Copyright INfo

- On your "scallloped rectangle"-layer: Selections - select all - select free - selection not free and expand it about 1px. Copy and paste a paper from your kit into the selection, invert the selection and press the delete button. Selection - none. Add a dropshadow of your choice.

- Repeat the step above with all the other layers, but use other papers.

- On your "frame background1"-layer: Selections - select all - select free - selection not free. Copy and paste a tubeand resize it. Invert the selectiond an press delete button. Selection none.

- Repeat the step above with "Frame background2" and the 2nd tube.

- Copy and paste a butterfly or another element of your choice, resize and rotate it a bit. Move it to the right and add a dropshadow.

- Write your text and/or name andd give it a small dropshadow

- Add Copyright info and save as.


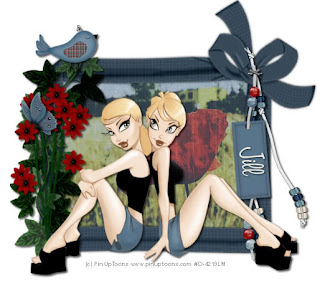
Garden Twins


his tutorial was written by and copyrighted to Seven in February 2009 and translated on 23th. July 2009


For this tutorial you will need:

- "Rion Rocks" Scrapkit from Created by Jill
- (Twin-) Tube of your choice. I used the fabulos work of Rion Vernon alias Pin Up Toons which you can purchase at C.I.L.M
- Stock-photo of your choice. I got mine at stock.xchng


Let's start

- Open a new white canvas 550x550 px

- Copy and paste a frame. Resize and/or mirror it.

- WIth you magic-wand click in the middle of your frame and expand the selection about 5px.

- Copy and paste a paper of your choice, move it under the frame layer, invert the selection and press the delete button. Invert the selection again

- Copy and paste your photo, invert the selection and press delete button. Deselect. Lower the opacitiy about 44%

- Add a dropshadow to your frame

- Copy and paste a twine and move it to the left of your frame. Add a dropshadow

- Copy and paste flowers, resize, move them onto your twine and add a dropshadow.

- Copy and paste the beadstrings, resize, add a dropshadow and move them at the right side of your frame.

- Copy and paste your tube, move it onto the border below and add a dropshadow.

- Decorate your tag with elements of your choice.

- Write your name on the tag of the beadstring and add a small dropshadow.

- Add copyright infos and save as.

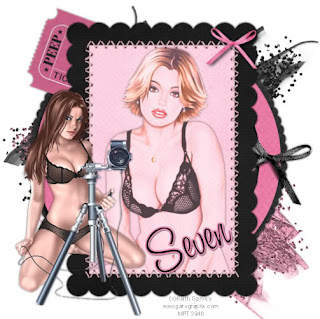
Peep Show Model


This tutorial was written by and copyrighted to Seven in January 2009 and translated on 23th. July 2009


For this tutorial you will need:

-"Peep-Show" Scrapkit from TammyKat & Designs by Sarah purchaseable at Pimp My Tags w/ Scraps
- 2 Tubes of your choice. I used the amazing work of Keith Garveywhich you can puchase at MPT.
- Font of your choice.

Lets Start:

- Open a frame from your kit and duplicate it with CTRL+D. Close the original.

- With your Magic Wand click inside the frame and expand the selection about 4px

- Copy and paste a paper of your choice. Change the selection and pull the delete button. Selection none. Move the paper under the frame layer.

- Copy and paste the first tube, resize and put it in your frame. Change it to "hard-light" and add a dropshadow

- Flatten all visible layers and copy your frame

- Open a new white canvas 600x600 px and paste your copied frame in it.

- Copy and paste the other tube and position it left on your frame. Add a dropshadow.

- Copy and paste the round frame under the frame layer and add a dropshadow.

- Copy and paste the glitter and add it under the round-frame-layer

- Copy and paste a ticket and position it under the frame layer, rotate it a bit and put it on a nice place. Add a dropshadow.

- Decorate your work with other elements.

- Add your name and copyright infos and save as.


Just another Princess


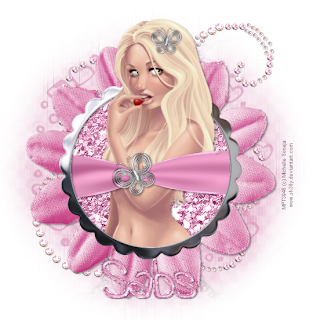
This tutorial was written by and copyrighted to Seven on 23rd October 2009


For this tutorial you will need:

- Sabs' Principessa -kit, which you can get here.
- A tube of your choice (I used a cute tube of Michelle Soneja which you can purchase at MPT)
- Mask of choice (I used WSL_Mask214 which you can get here)
- Font of your choice (I used Yummah Strawberriez)

Let's get ready! ♥


- Open a new canvas 600x600 px.

- Copy and paste a paper of your choice (Paper_05) and apply the mask on it.

- Copy and paste a flower frame of your choice (Frame_01, _02 or _03) and resize it abit.

- With your magic wand click inside of the frame and expand the selection about 3.
Copy and paste a glitter-paper of your choice and move it below the frame layer.
Selection - invert and press delete.
Selection none.
Add a dropshadow to your frame.

- Copy and paste your main tube.
Resize it and add a dropshadow.
Erase the parts from the body of your tube which were looking outside of the frame.


- Copy and paste a butterfly-wrap (wrap_04, _05 or _06) over your tube layer.
Dropshadow it.
Erase the parts of the endings of the wrap that it looks like that it woud be spaned over the tube.
(see my tag for help)

- Highlight the mask layer.
Copy and paste one of the blings (Bling_04, _05 or _06).
Resize them a bit and add a dropshadow.

- Highlight your tube layer again.
Copy and paste the silver-butterfly (butterfly_05) and resize it very small.
Move it over the hair of your tube and add a small dropshadow.

- Choose a mataching background colour and as foreground colour choose a glitter-paper.
Write your name on your tag and add a dropshadow.
(I also added a glass effect)

- At least add all Copyright-information and/or watermark and save as.

Ready ♥

Tiny's Halloween Party


This tutorial was written by and copyrighted to Seven on 23rd October 2009

- Tiny D's Happy Spookoween -kit, which you can purchase here
- My Template #3 which you can download here
- Font of your choice (I used Gigi)


Let's start!

- Open my template.

- Copy a yellow or orange paper (pp25) from the kit and highlight the circle layer.
Selection - Selection all - Selection free - Selection not free.
Expand the selection about 1px.
Paste your paper into the selection.
Selection none.
Add a dropshadow to this layer.

- Repeat the above mentioned step with your stars (I used 3 different violet paper), the rectancle and the frame inlay (I used black ones).
Repeat this step also with the frame-layer (I used a green paper) but don't add a dropshadow.

- Highlight the frame layer and with your magic-wand click inside of the first rectangle of the frame and expand the selection about 1 px.
Resize and copy a monster or trickster from the kit.
Paste it to your canvas and move this layer under the frame layer.
Postion it that the head is in the frame.
Selection invert and hit delete.
(See my tag for help)

- Repeat this step above with the other parts of the frame.

- Add a dropshadow to your frame layer.

- Copy and paste two (or more) ghosts from the kit, resize and dropshadow them.
Move one to the left and the other one to the right side.

- Copy and paste a lollipop from the kit, resize it very small and dropshadow it.
Move it on the last frame to the right and rotate it a bit.
Duplicate this layer and mirror it.
Move it to the first frame to the left side.

- Highlight the background layer.
Copy and paste one of the glitter splashes and move it to the top.
Copy and paste the other glitter splash, mirror it and move it a bit to the ground.

- Choose your font and write your name.
Dropshadow it.

- At least you just have to add copyright-infos and/or watermark and save as.

Easy, or?


Mittwoch, 14. Oktober 2009

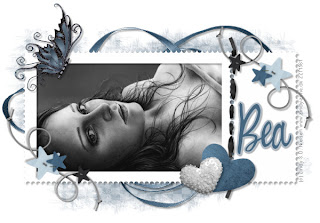
Kitsune


This tutorial was written by and copyrighted to Seven on 15th October 2009


For this tutorial you will need:

- Sabs' Hope is forever -kit, which you can download here.
- 1 picture/painture of your choice (I used the fabulous work of Suzanne Woolcott. You can purchase her stuff here.)
- Font of your choice (I used A&S BlackSwan)


Let's get ready!

- Open a new canvasn 550 x 550 px.

- Copy and paste the wire (element_03). Resize it and rotate it a bit. Add a small dropshadow.

- Copy and paste frame_07 and resize it a bit. With your magic wand or selection tool select the inner side of the frame.

- Copy and paste your picture move this layer under the frame layer and postion it into the frame. Invert the selection and press delete.

- Add a dropshadow to your frame.

- Copy and paste one of the paper circles (element_20 or _21), resize it and move this layer under the frame and picture layer. Postion it to the left higher side and add a dropshadow.

- Copy and paste one of the mats (element_06 or _07), resize and rotate it a bit. Move this layer to the right lower side and dropshadow it.

- Highlight your frame layer.

- Copy and paste a ribbon (element_04 or _05), resize it and move to the ground of your frame. Add a dropshadow.

- Copy and paste the big flower (element_35), resize and dropshadow it. Postion it to the left side of your wire and frame.

- Copy and paste yoour tag (element_40), resize and rotate it a bit and move it to the right side over your ribbon. Don't forget the dropshadow.

- Write your name and/or text on it and give it a small dropshadow.

- Copy and paste the butterflies (element_33 and _34) resize and decorate your tag with them. Add a dropshadow.

- At least just add copyright and/or watermark and save as.

Ready ♥

Samstag, 10. Oktober 2009

Magic of Halloween


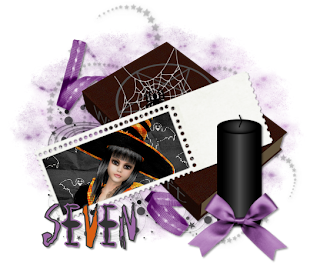
This tutorial was written by and copyrighted to Seven on 10th October 2009.


For this tutorial you will need:

- My FTU-kit Ghost Train which you can download here
- A witch tube of your choice (I used one of the witch tubes which are in this kit)
- Mask of choice (I used WSL_Mask75 which you can get here)
- Xero - Radiance (optional)
- Halloween-Font of your choice (I usedMonsterChild)


Let's try it:

- Open a new canvas 600 x 500px

- Copy and paste a paper of your choice and apply the mask.

- Copy and paste the twirls, resize if necessary and add a small dropshadow.

- Copy and paste one of the ribbon, resize it and move it a bit to the middle of the canvas.
Dropshadow it.

- Copy and paste the book, resize it and add a dropshadow.

- Copy and paste spider01 and postion it over the star of your book.

- Copy and paste the stamp frame (frame16) and resize it.
Rotate it a bit. (see my tag above for help)

- With your magic click inside of the frame and expand the selection about 3px.

- Add a new raster layer and copy another paper of your choice.
Paste it into the selection.

- Move this layer under the frame layer.

- Copy and paste your tube. Postion it under the frame layer, so that the face is in the frame.
Invert the selection and press delete.
Selection none.

- If you want you can add the Cero-Radiance or an other nice effect on your tube.

- Add a small dropshadow to your frame.

- Copy and paste a candle of your choice, resize and dropshadow it.
Move it to the right side.

- Copy and paste a bow of your choice, resize it and postion it on the lower part of your candle.
Add a dropshadow.

- Choose your font and write your name in different but matching colours.
Add a small dropshadow.

- At least you just need to add copyright and/or watermark and save as.

Happy Halloween! ♥


Montag, 5. Oktober 2009

Perfectly Pink


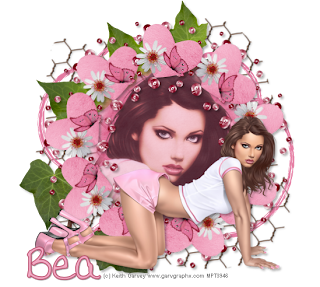
This tutorial was written by and copyrighted to Seven on 05th October 2009.


For this tutorial you will need:

- Bea's PTU-kit Summer Love which you can get here
- A tube and a close up tube of your choice (I used a totally sexy tube of Keith Garvey which you can purchase at MPT)
- PlugIn Xero - Radiance


Let's start:

- Open a new canvas 600x600px.

- Copy and paste the wire, resize it and add a small dropshadow.

- Copy and paste a doodle (doddle3).

- Copy and paste the leaves (leaves2), resize a bit, add a dropshadwo and move it to the left.

- Copy and paste deco3 and add a dropshadow.

- Draw a feathered circle with your selection tool around the middle of the deco.

- Copy and paste a paper of your choice, move it below the deco.
Selection invert and hit delete 3 times.
Selection invert.

- Copy and paste your Close-Up tube and resize it.
Selection invert and hit delete again.
Selection none

- Apply the Xero Radiance plugin with the standardsettings and reduce the oppacity of the tube.

- Highlight the deco-layer.

- Copy and paste your tube, resize and dropshadow it.

- Choose a darker foreground and a lighter background colour and write your name.
Dropshadow it.

- Just add copyright info and/or watermark and save as.


Donnerstag, 1. Oktober 2009

Secrets


This tutorial was written by and copyrighted to Seven on 01st October 2009.


For this tutorial you will need:

- Dee's Frosted Velvet-kit, which you can get here.
- Tina's Template which you can download here.
- A woman-tube of your choice (I used a totally awesome tube of Jose A Cano which you can purchase at MPT)
- Mask of choice (I used WSL_Mask220 which you can get here)
- Font of your choice


Let's start!

- Open the template and resize it about 80 %.

- Delete the copyrigh-layer (Raster1).

- Highlight the circle up right layer.
Selection - free - not free and expand it about 1px.

- Copy one of the satin-paper (paper9 or paper10) and paste them into the selection.
Selection - none and add a small dropshadow.
Repeat this step on the circle downl left layer.

- Repeat the above mentioned step with the both smaller circles and the hearts.
Use for the circles something grungy or swirly and for the hearts the other satin paper.

- Add also a dropshadow to the diamond circles.

- Highlight the rectangle-layer and copy an other paper of your choice.
Selection - free - not free and expand it about 1px.
Paste the paper into the selection.
Expand the selection again but this time about 3px and add a new raster-layer.
Fill them with a dark color of your choice.
Move this layer below the rectangle layer and merge both layer.
Add a dropshadow

- Copy and paste one of the glitterdoodle (1 or 2), resize and move it down to the right edge of the rectangle. Add a small dropshadow. Duplicate this layer and mirror it horizontal and vertical.
Move it to the left higher edge of the rectangle.

- Copy and paste the hangingvine, resize and add a dropshadow move it above the circle layers.
Duplicate and mirror it horizontal and vertical.

- Copy and paste a flower (flower1) and resize it. Add a dropshadow and decorate your hangingvines with it. (I duplicated and resized it again)

- Copy and paste a charm of your choice, resize and dropshadow it. Move this layer under the hearts layer. (see my tag above for help).

- Copy and paste your tube position it to the center of your canvas and add a dropshadow.

- Highlight the wordart-layer and color it into a matching color and add a small dropshadow.

- Highlight the background layer and copy and paste a paper of your choice.
Use the mask on it.

- Add your name to the tag and dropshadow it.

- At least you just need to add copyright and/or watermark info and save as.

Samstag, 26. September 2009

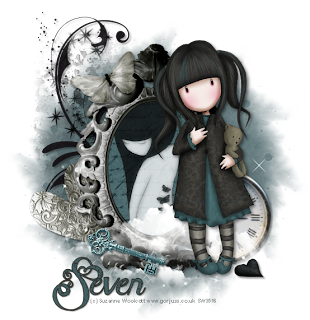
Magic Melody


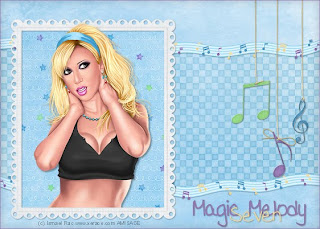
This tutorial was written by and copyrighted to Seven on 26th September 2009.


For this tutorial you will need:

- Lullaby-kit from Misty Cato which you can get at Sweet Shoppe Designs
- A tube of your choice (I used a fabulous tube of Ismael Rac which you can purchase at AMI)
- Font of your choice (I used DJBMelisss, which you can also get at SSD)

I resized all my elements in tagger sized before I started.

Let's start:

- Open a new canvas 560x400px.

- Copy and paste a paper (solid4) of your choice.

- Copy and paste the musicnoteborder and move it a little bit to the top. Add a small dropshadow. Duplicate this layer and move it a little bit to the ground. (see my tag for help)

- With your selection/rectangle tool select a area between the two borders.

- Copy and paste a paper (pp4) and invert the selection. Press the delete. Selection - none.
Move this layer under the both border layers. Reduce the oppacity of the layer about 20 - 30%.

- Copy and paste a frame (frame3) and rotate it about 90 degrees. Move it a bit to the left side of your canvas.

- With your magic wand click inside of the frame and expand the selection about 4px.

- Copy and paste a paper and move it under the frame. Invert the selection and press delete button. Selection none.

- Copy and paste your tube and move it in the middle of the frame. Erase those parts of the tube which are looking over lower part of the frame. Add a dropshadow.

- Dropshadow your frame.

- Copy and paste one of the hanging notes and add a small dropshadow. Move it a little bit to the right.

- Repeat this step with the other two. But displace them a little bit more two the top or to the ground. (see my tag for help)

- Write your text and/or name with a font of your choice and add a small dropshadow.

- Add a 1 px border in a matching color.

- Add Copyright and/or watermark and save as.

Ready! ♥

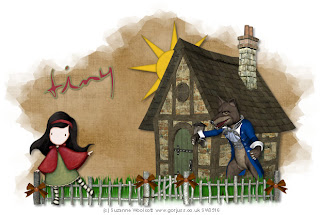
Big Bad Wolf


This tutorial was written by and copyrighted to Seven on 26th September 2009.


For this tutorial you will need:

- Tiny D's Big Bad Wolf -kit, which you can purchase here
- tube of your choice (I used the fabulous work of Suzanne Woolcott. You can purchase her stuff here.)
- Grass Tube of your choice (I made mine using the stamp-tool of psp)
Mask of choice (I used WSL_Mask220 which you can get here)
- Font of your choice (I used violation)


Let's start:

- Open a new canvas 650x500px. (you can resize it later)

- Copy and paste the fence and add a small dropshadow.

- Copy and paste your grass tube and move this layer under the fence layer.

- Copy and paste one of the houses, resize it and add a dropshadow. Move it below the grass layer and a little bit to the right.

- Copy and paste a wolf-tube, resize and dropshadow it. Position it on the right side of the house.

- Copy and paste your main tube, resize it and move it to the left side over the fence layer. Add a dropshadow.

- Copy and paste a bow and resize it very small. Add a small dropshadow and decorate your fence with it.

- Copy and paste the sun, resize and dropshadow it. Move this layer under the house layer and arrange it.

- Copy and paste a paper of your choice. Move this layer under all the layers and add your mask.

- With your selection tool, draw a selection about the parts of the paper which are looking under the frame. Press delete button.

- Write your name with a nive font, rotate it and add a dropshadow.

- Add all copyright-infos and/or watermark and save as.

Easy, eh?

Samstag, 19. September 2009

In Loving Memory


This tutorial was written by and copyrighted to Seven on 19th September 2009

This kit is dedicated to my unborn baby Ky, who went to heaven too soon.
My little Angel, Mommy and Daddy miss you!


For this tutorial you will need:

- Sabs' In Memory of -kit, which you can download here.
She dedicated this kit to me and my angel.
Dear Sabs, I can't thank you enough!
- 1 tube of your choice (I used the fabulous art of Zindy Nielsen. I used a free art and you can download it on her site.)
- Mask of your choice (I used WSL_Mask214 which you canget here)
- Font of your choice


Let's start:

- Open a new canvas 600x600 px.

- Copy and paste a paper of your choice and use the mask on it.

- Copy and paste one of the heart frames (element_47 or _48) and resize it if necessary.

- With your magic-wand click insie of the frame and expand the selection about 7px.

- Copy and paste a paper of your choice and move it below your frame-layer.

- Selection invert and press the delete button.

- Copy and paste one of the drop-elements (element_39 or _40), arrange it and press the delete button again. Selection - none.

- Highlight the heart frame. With you selection-tool select a rectangle above the flowers of the frame. Press delete.

- Add a dropshadow to your heartframe.

- Copy and paste one of the frames (element_27 or _28), resize and click inside the frame with your magic-wand.

- Expand the selection about 7px.

- Copy and paste another paper and move it below the frame-layer.

- Selection- invert and press the delete button. Selections none.

- Add a dropshadow to your frame.

- Copy and paste your tube. Resize it if necessary and erase part of it, so that it looks if it would came out of the frame. (eee my tage above for help). Add a small dropshadow.

- Copy and paste a candle, resize and dropshadow it and arrange it in the middle of your lower-part of the frame.

- Decorate your tags with flowers and butterflys.

- Write your text or your name on the tag and add a small dropshadow.

- At least add copyrigh-info and/or watermark and save as.

Thank you very much!


Mittwoch, 16. September 2009

Heartless


This tutorial was written by and copyrighted to Seven on 16th September 2009.


For this tutorial you will need:

- My Heartless-kit, which you can purchase here or here
- 2 tubes of your choice (I used the fabulous work of Suzanne Woolcott. You can purchase her stuff here.)
Mask of choice (I used WSL_Mask82 which you can get here)
- Xero - Radiance
- Font of your choice (I used MT Under Your Skin)


Let's start:

- Open a new canvas 600x600px

- Copy and paste a paper of your choice ans use the mask on it.

- Copy and paste frame22 or frame23 and resize it a bit.

- With your magic-wand click inside of the frame and expand the selection about px.

- Copy and paste a paper of your choice and move it under the frame layer.

- Selection invert and press delete button.

- Copy and paste your first tube, move it in the middle of the frame and press again the delete button.

- Selection - None

- Greyscale the tube.

- Apply Xero - Radiance with the standard settings.

- Reduce the opacity a bit.

- Merge the frame, tube and paper-layer together.

- Higlight the mask layer.

- Copy and paste a doodle (doodle04), resize if necessary and move it to the left side. Add a small dropshadow.

- Copy and paste a heart (heart05 - 08), resize and rotate it a bit and postion it to the left. Dropshadow it.

- Copy and paste the sparkle, resize it and move it to the lower part of the frame.

- Copy and paste the clock, resize and move it to the right side of your frame. Add a dropshadow.

- Highlight your frame layer.

- Copy and paste a butterfly, resize and rotate it a bit. Position it to the right upper part of the frame. Dropshadow it.

- Copy and paste the cloud, resize it and move it on the lower part of the frame.

- Copy and paste the key, resize and dropshadow it. Move it a bit to the left.

- Copy and paste your main tube. Postion it to the right side on your frame and add a dropshadow.

- Choose your font and write your name with a dark foreground and a light background color and apply a small dropshadow.

- Just add copyright-infos and/or watermark and save as.

Dienstag, 15. September 2009

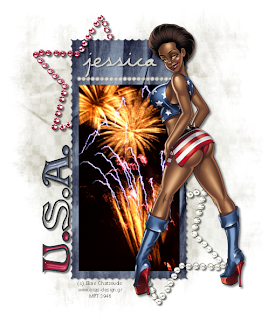
U.S.A.


This tutorial was written by and copyrighted to Seven on 15th September 2009.
It's dedicated to all my friends who live in the U.S.A.! ♥


For this tutorial you will need:

- My FTU-kit Americana which you can get here
- A tube of your choice (I used a totally sexy tube of Elias Chatzoudis which you can purchase at MPT)
- A firework photo of your choice. (I used one, which I made by myself)
- Mask of choice (I used WSL_Mask297 which you can get here)
- Eye Candy 3.01 - Glass
- Impact-Font of your choice (I used Deneane)
- hand-written font of your choice (i used violation)


Let's start:

- Open a new canvas 600x600px.

- Copy and paste a paper of your choice and use the mask on it.

- Copy and paste a stamp-frame (frame03 - frame07) and resize it a bit.
Rotate it about 90° to the right.

- Click inside the frame with your magic wand and expand the selection about 2px.

- Copy and paste your photo, resize and position it under the frame-layer.
Invert the selection and press delete key.

- Add a small dropshadow to your frame and merge it with the photo layer.

- Copy and paste a star and move it on the left upper edge.
Erase parts of it, so that it looks like, if the star would be over and under the frame.
(See my tag for help)
Add a dropshadow.

- Repeat this step with the left lower edge of the frame.

- Copy and paste your tube and position it. Dropshadow it.

- Choose a dark foregroundcolor and an other background color.

- Write your text (U.S.A) with the impact- font, but change at every letter the background-color.
(I used for the foregroundcolor a line width about 2,5px)

- Rotate it about 90° to the left.

- Selection - selection free - selection not free and reduce the selection about 3px.

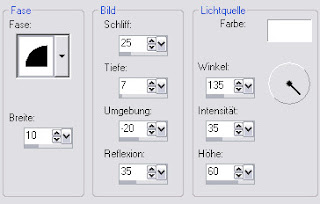
- Use the innerface with the following settings:
(sorry I just have it in german, please click on the picture to enlarge)


- Now use your PlugIn Exe Candy 3.01 with the following settings:
(click on the preview to enlarge)


- Selections - none.

- Add a dropshadow.

- With your handwritten font write your name and add small dropshadow.

- At leaste just add copyright-infos and/or watermark and save as.

Montag, 7. September 2009

Break


I need a break to sort some things etc.
Won't be around the next weeks!
Sorry for that!

Sonntag, 6. September 2009

Stargazer


This tutorial was written by and copyrighted to Seven on 06th September 2009


For this tutorial you will need:

- Bea's Stargazer -kit which you can get here
- 1 lying-tube of your choice (I used the fabulous art of Zindy Nielsen, which you can buy at her own shop.)
- Mask of your choice (I used WSL_Mask297 which you canget here)
- Eye-Candy 4000 - radient Glow (optional)
- Font of your choice


Let's start:

- Open a new canvas 600x450px and will it with white.

- Copy and paste a paper of your choice and use the mask on it.

- Copy and paste the stamp-frame (frame1), resize and click with your magic-wand inside of it.

- Expand the selection about 3px

- Copy and paste a paper, resize a bit and move it under the frame layer.

- Invert the selection and press your delete button. Invert the selection again.

- Copy and paste your tube, move it under the frame, resize it, invert the selection and press delete. Selection none. Add a small dropshadow to your tube and your frame.

- Copy and paste a ribbon (ribbon1 or ribbon2) and move it under the paper layer. Dropshadow it.

- Copy and paste the element star5, resize it and add a dropshadow. Move it to the right edge above. Duplicate it and mirror it horizontal and vertical.

- Copy and paste the stitching (stitche), rotate it about 90 degrees and add a dropshadow. Arrange it on the "dotted line" of your frame.

- Copy and paste a paper-heart, resize and dropshadow it and move it on the lower side in the middle of the frame.

- Copy and paste the heart-element heart3, rasize and dropshadow it and move it a little bit over the paper heart.

- Copy and paste a butterfly (butterfly2), resize and mirror it. Add a dropshadow and postion it on the left edge of your frame.

- Write your name on your tagand add a gradient glow. Give it a small dropshadow.

- Add Copyright-Infos and/or watermark and save as.


Donnerstag, 3. September 2009

Star Student


This tutorial was written by and copyrighted to Seven on 03rd September 2009.


For this tutorial you will need:

- Tiny D's PTU-kit Returning 3 Skool which you can get here
- A tube of your choice (I used a cute tube of Barachan which you can purchase at MPT)
- Font of choice


Let's start:

- Open a new canvas 600x600px and fill it with white. (You can resize it later)

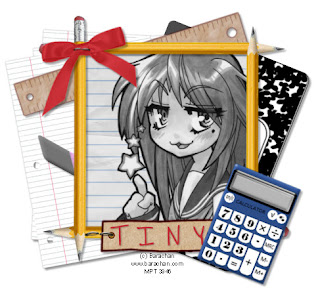
- Copy and paste the pencil (pencil) and move it a little bit above. Duplicate it mirror it vertical and horizontal. Copy and paste the other pencil (pencil2) position it on the left side over your other ones. Duplicate it and mirror it vertical and horizontal. Merge the 4 pencil-layers.
Now, we've got a frame.

- With your magic-wand click inside of the frame and expand the selection about 6px.

- Copy and paste a paper (pp9), move it below the frame, invert the selection and press delete.

- Copy and paste your tube and move it under the frame-layer. Press delete again. Selection - none. (I colored my tube black and white)

- Add a dropshadow to the frame layer

- Merge the frame, tube and paper layer.

- Copy and paste the notepaper (notebookppr), resize and move it under the frame them below the frame. Add a small dropshadow.

- Copy and paste the ruler, resize and rotate it a bit. Move it under the frame a little bit to the right upper edge. Add a dropshadow.

- Copy and paste the eraser, resize, rotate and dropshadow it. Move it over the papers.

- Copy and paste the compbook, rotate it, add a dropshadow and move it to the right side under all the other layers.

- Copy and paste the calculator, resize and rotate it and position it on the lower right edge above the frame. Dropshadow it.

- Copy and paste a bow, resize and rotate it and position it on the higher right edge. Dropshadow it.

- Copy and paste the label, resize and dropshadow it. Move it under the layer in the middle of lower pencil of the frame.

- Add your name to the label.

- Copy and paste the staple, resize it very small and fasten up your label.
After this duplicate this layer and fasten up your bow.

- Ad least add copyright-infos and/or watermark, resize the tag and save as.


Mittwoch, 2. September 2009

Elve


This tutorial was written by and copyrighted to Seven on 03rd of August 2009


For this tutorial you will need:

- Julie's "Angel and Fairies" kit which you can get here. (Hurry up! At the moment it's a freebie!)
- 1 Close-up Tubeof your choice (I used the fabulouse poser-art from Outlaws by Design)
- Font of your choice
- Mask of your choice (I used WSL_Mask259 which you can download here)


Let's start!


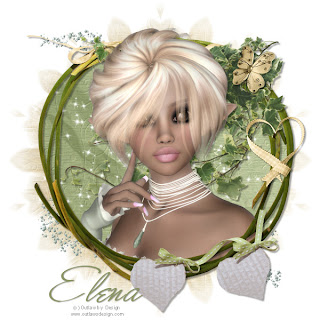
- Open a new white canvas 600x600px and fill it with white.

- Copy and paste a paper of your choice and use the mask on it.

- Copy and paste a fairy-dust.

- Copy and paste frame of your choice and resize it if necessary.

- With your magic wand click inside of the frame and also in the bigger spaces of the frame. Expand the selection about 5px.

- Copy and paste a paper, invert the selection and press delete button. Move this layer below the frame-layer.

- Add a dropshadow to your frame.

- Copy and paste sparkle and move it under the frame but above the paper layer.

- Copy and paste the ivy, resize if necessary and move it on the right side. Dropshadow it.

- Copy and paste your tube of your choice, resize and add dropshadow. Erase wit the eraser-tool part of the tube which are over the lower edge of your frame and erase some part of the frame which are "under" your tube, so that it looks like that your tube comes out of the frame. (see my tag above for help)

- Copy and paste a butterfly, resize and dropshadow it. Move it above the ivy.

- Copy and paste a heart, resize and dropshadow it and move it to the right side of your frame.

- Copy and paste one of the heart-tags and add a dropshadow. Move it to the lower edge on the right side of your frame.

- Write your name with a font of your choice and add a small dropshadow.

- At least add copyright-info and/or watermark and save as!

Easy, hu?

Boobies for Huy


This tutorial was written by and copyrighted to Seven on 02nd September 2009.
It's dedicated to my friend Huy, whose favourite word is "boobies" ♥
Em yeû anh! :)


For this tutorial you will need:

- Bea's PTU-kit Ooh so blue! which you can get here
- A tube of your choice (I used a totally sexy tube of Elias Catzoudis which you can purchase at MPT)
- Mask of choice (I used WSL_Mask12 which you can get here)
- PlugIn EyeCandy 4000- Gradiant Glow (optional)


Let's start:

- Open a new canvas 600x600 px and fill it with white.

- Copy and paste a paper of your choice and use the mask on it.

- Copy and paste the natur3 element and add a small dropshadow.

- Copy and paste a frame (frame3) and resize it if necessary.

- With your magic-wand click inside of the frame and expand it about 5px.

- Copy and paste another paper, invert the selection and press delete.

- Move this layer below the frame layer.

- Add a dropshadow to the frame.

- Copy and paste your tube ans postion it on the left side of the frame. Erase the lower parts of the tube which are looking over the frame.

- Add a dropshadow to your tube.

- Copy and paste bead4, move it under the natur-layer to the left side and add a small dropshadow.

- Copy and paste the bling2, rotate it about 90° and move it on the right side of the frame. Add a small dropshadow.

- Copy and paste a flower and move it in the middle of the right side of the frame and bling. Add a dropshadow.

- Copy and paste the butterflies, resize them, add a dropshadow and decorate your tag with them.

- Copy and paste a bow of your choice, move it on the lower edge in the middle of your frame and dropshadow it.

- Copy and paste a button, resize it very small, dropshadow it and move it below the middle of your bow.

- Copy and paste two hearts, resize and dropshadow them, rotate them a bit and move them below the bow-layer. Position one onthe right and the other on on the left side.

- Write your name with a font of your choice, add a small gradient glow and a small dropshadow.

- Add least add copyright-infos and/or watermark and save as.


Ready ♥

Dienstag, 1. September 2009

XERACX


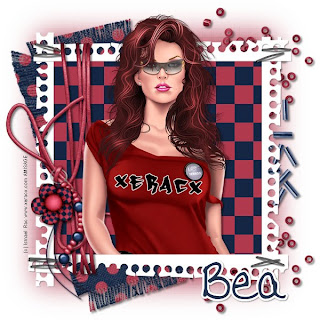
This tutorial was written by and copyrighted to Seven on 01st September 2009


For this tutorial you will need:

- Bea's Freebie kit Thank You which you can get here
- A tube of your choice (I used a fabulous tube of Ismael Rac which you can purchase at AMI)
- Mask of choice (I used the eraser tool)
- PlugIn EyeCandy 4000- Gradiant Glow (optional)


Let's start:

- Open a new canvas 600x600px and fill it with white.

- Copy and paste a paper of your choice and use your mask on it or soften the edges with the eraser-tool.

- Copy and paste frame1 and resize if necessary.

- With your magic-wand click inside of the frame and expand the selection about 4px.

- Copy and paste another paper of choice (p1), resize it a bit and move this layer under the frame layer. Selection - Invert and press the delete-button.

- Copy and paste your tube and arrange it over the frame layer. (see my tag for help) Add a dropshadow

- Copy and paste deco5, move it under the frame and paper layer, rotate it a bit, move it to the left, resize and add a dropshadow.

- Copy and paste bead1 and bead2 and arrange them under the frame and paper layer at the right side. Add a dropshadow.

- Copy and paste string1 or string2, move it over the frame layer two the left. Resize and add a dropshadow.

- Copy and paste pendant1 and arrange it with the chain over the knot of the string and resize a bit. Erase a little bit of the chain and add a dropshadow.

- Write your name with a font of your choice and add a small gradient glow. Dropshadow it.

- At least add copyright-infos and/or watermark and save as.


Samstag, 29. August 2009

Julie


This tutorial was written by and copyrighted to Seven on 29th August 2009


For this tutorial you will need:

- Julie's Summer Bride -kit which you can get here
- 1 face tube of your choice (I used the fabulous art of Zindy Nielsen, which I bought at MPT. Now you can buy her beautiful art at her own shop.)
- Font of your choice


Let's start:

- Open a new canvas 550x550px. You can resize it later.

- Copy and paste one of the quadratic frames (frame-3 or frame-4).

- Click inside of the frame with your magic-wand and expand the selection about 2px.

- Add a new raster layer and copy and paste a paper of choice into the selection.

- Copy and paste your tube and resize it, if necessary. Invert the selection and press the delete button on your keyboard. Selection none.

- Move the frame above the other two layers and merge them visible.

- Copy and paste one of the circle frames (frame-5 or frame-6) and move it under the first frame-layer. Move it a little bit more to the right side (see my tag above for help).

- Copy and paste a cage, resize and move it on the top of your first frame into the right edge. Add a small dropshadow.

- Copy and paste a flower of your choice, resize and move it to the right bottom edge. Add a small dropshadow.

- Duplicate the flower-layer, resize it a little bit again and move this one to the left edge on the top.

- Choose a nice font and write your name on it. Add a small soft dropshadow.

- At least just add copyrightinfo and/or watermark

Ready ♥

Sonntag, 23. August 2009

Heaven's Angel


This tutorial was written by and copyrighted to Seven on 23rd August 2009


For this tutorial you will need:

- Julie's Heaven Sent -kit which you can purchase here
- 1 Angel tube (I used the one which came with the kit)
- Font of your choice
- Mask of your choice (I used the eraser)


Let's start:

- Open a new canvas 550 x 550 px.

- Copy and paste a paper of your choice and use your mask on it or soften the edges with the eraser-tool.

- Copy and paste a glitter frame, resize and add a small dropshadow.

- Copy and paste the gate-left, resize and add a small dropshadow. Duplicate this layer and mirror it.

- Copy and paste a cherry blossom stem, resize and add a small dropshadow. Move it below the gate layer. Duplicate this layer and mirror it.

- Copy and paste the ivy, resize and dropshadow it. Move it over your gate. Duplicate and Mirror it.

- Copy and paste a flower, resize and dropshadow it. Decorate your ivy with it. Don't forget to duplicate and mirror ;)

- Copy and paste a cloud and resize it if necessary. Duplicate this layer and mirror it. Merge the two cloud layers together and add a very small and light dropshadow.

- Copy and paste your tube, resize and add a dropshadow.

- At least write your name and add a small dropshadow. Add Copyright infos and save as .png

Easy, hu?

TOU

All tutorials are written by myself and any resemblance to any other tutorial is purely coincidental.
You are allowed to make tags, stats, layout what ever your want with them.
You are not allowed to make any monetary gain with them.
You are not allowed to hotlink.
I do not allow to translate it whithout my written permission!


It would be great if you mail me your results at coroners.sun@gmail.com

  © Blogger template Ramadhan Al-Mubarak by Ourblogtemplates.com 2008

Back to TOP