Freitag, 24. September 2010

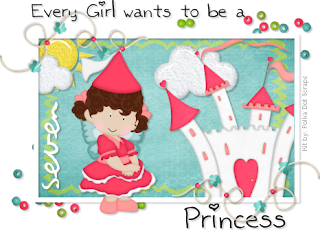
Every Girl wants to be a Princess


This tutorial was written by and copyrighted to Seven on 24th September 2010.

Some ppl asked me if there's a tut for my little tag but it wasn't until today! ;)

For this tutorial you will need:

- Chassity's PTU-kit My Doll kit
- 2 fonts of your choice (I used Kaileen and violation)


Let's begin:


- Open a new canvas 500 x 400 px ( you can crop it later).

- Choose white as your foreground colour and none as background colour.

- With your rectangle (stroke 5 or 6) draw out a rectangle in the middle of your canvas.
Change this layer into a raster lay.

- Use your magic wand and click inside of the rectangel.
Expand the selection about 3.

- Copy and paste a paper of your choice.

- Invert the selection and press delete button on your keyboard.
Selection none.

- Move this layer under your frame layer.

- Highlight your frame layer and add a small matching dropshadow.

- Highlight your paper layer

- Copy and paste the castle, sun and cloud over your paper layer and arrange them
(you will have to resize and maybe rotate them)
Dropshadow them slightly.

- Copy and paste the beads (element43), resize and dropshadow them.
Move this layer under the paper layer.

- Arrange your beads to the right lower edge.

- Duplicate this layer

- Mirror vertical
Mirror horizontal.

- Highlight your frame layer

- Copy and paste the beadstring (element44), resize and dropshadow it.
Arrange it to the right upper boarder of the frame.

- Duplicate this layer.

- Mirror vertical
Mirror horizontal

- Copy and paste one of the fairy princesses (element1 or element2), resize and dropshadow it.
Move it over your tag a little bit to the right side.

- Choose black as your background colour and your first font (Kaileen)
Add your text.
Change vector to raster layer and dropshadow it slightly.

- Highlight your paper layer.

- Choose white as your background colour and your second font (violation)
Type your name and change it to a raster layer.
Dropshadow it.

- Rotate this layer abot 90 degrees and arrange it in your tag.

- Resize/crop and add watermark/copyright sign and save as.

Ready!

I hope you understand everything, It's a long time ago when I wrote a tutorial! *loool*

Montag, 2. August 2010

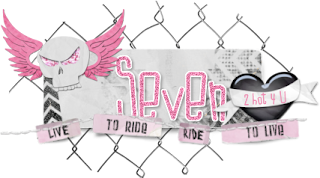
2 Hot 4 U


This tutorial was written by and copyrighted to Seven on 02nd August 2010.

This is a really quick and easy tag :D


For this tutorial you will need:

- Tammy's part of Biker Babe Collab (purchaseable at PMTWS)
- font of your choice ( I used LDJ JillyNilly)


Let's begin:

- Open journalpiece and duplicate it with Shift+D
Enlarge the canvas about 450 x 300 px

- Copy and paste wordart1 and resize it.
Arrange it over the tag to the bottom

- Copy and paste one of the skulls with wings (skull-pinkgem) and resize it.
Move it to the left over the screw of your tag.

- Highlight your tag-layer and copy and paste one of the hearts with banner (heartbanner-blkplain).
Resize it and move it to the right, a little bit under the wordart.

- Choose a matching background colour and your font and write "2 Hot 4 U" or a text of your choice over the banner.
Convert to raster layer

- Highlight your tag again.

- Write your name on it and add a picture noise effect of your choice.
Convert to raster layer.

- Select all - free - not free and espand the selection about 2.
Add a new raster layer and fill it with white.
Move this layer under your name.
Selection none.
Add a small dropshadow.

- Merge all layer visible and save as.

HURRAY!

I'm back back back back back back back back! *dance*

And I'm happy!

I've got the world best Mum and world best Uncle!
They rescued my PC and most of my datas!
Woohoooo! I just lost things which were on my C harddrive :D
And this wasn't that much! :S

Whoooot Whoooot!

That's great :D

At the moment I'm installing and installing! :S


Thank you all for you help offers and lovely mails!
You're great!

Seven

Montag, 26. Juli 2010

ATTN - I lost everything

My Dears,

I don't know when I will be back.
My PC got a Trojan on my harddrive and it toally crashed my PC.
We wasn't able to repair or rescue any of my datas.
I'm so sad.
I lost hundreds of personal/private photos, datas, 10 GB CU Items, 10 GB PTU-Toobs, Things to create Poser Toobs and many many other stuff. I have lost more than 100 GB.
I don't have any toob to play with and I don't have one CU Item to create a new kit.
I lost all my selfmade stationaries.
Everything.
I am so sad about it, because it was one of my biggest hobbies.
Photography and Graphic.
At the moment I am not able to repurchase anything etc. because I'm still going to school and therefore I don't have enough money for it.

I just wanted to let you know that I don't know when I will be back in creating or when I'm back online because we don't know when my PC will be okay again.

I really miss to create and to talk to all of you guys.

Hugs and Kisses
Seven

P.S.: You can reach me at sarahgeisler1987 at gmail.com

Dienstag, 22. Juni 2010

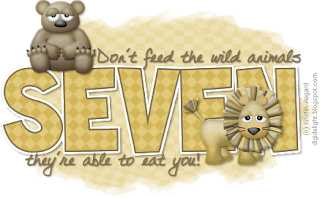
Don't feed


This tutorial was written by and copyrighted to Seven on 22th June 2010.

Some monthes a go I saw a taggie which looks nearly the same and I fell in love with it. *lol*
I asked the owner of it if there's a tut and she said no.
So I decided (and asked) if it's okay to made a tag (tut) which looks a bit like this but mostly with some of my ideas in it and I got the o.k. :)
Thank you so much Kathy!!! ♥


For this tutorial you will need:

- 2 small animal tubes (the ones I used are from the beautiful "Zoo Day" kit from Kristin Aagard)
- 2 fonts of your choice, a bigger one and a handwritten one (I used ToonRegular and DJBDiane)
- Mask of choice (I used WSL_Mask218 which you can get here)
- a pattern of your choice


Let's begin:

- Open a new canvas 500 x 350 px (if your name is longer you maybe have to use a larger width).

- Choose a darker colour for your foreground and a lighter colour for your background.

- Add a new raster layer and fill it with your lighter colour.
Apply your mask.

- Choose your text tool and your bigger font.
Font size 100 and stroke size 2.
Write your name and change the vector layer into a raster lay.

- Selection - All - Free and expand the selection about 3.

- Add a new raster layer and fill it with white.

- Selection none.

- Move the white layer under your name layer and add a dropshadow.

- Merge these 2 layers visible.

- Highlight your name and click with your magic wand inside of every letter which are in your lighter color.

- Add a new raster layer and fill it with your pattern.
Change it to soft light and reduce the opacity to 25

- Selection none.

- Merge these two layers visible.

- Copy and paste your tubes, resize them and arrange them on your tag.
Add a small dropshadow to them.

- Use your text tool again.
Change your background to your darker colour (no foreground colour).
Font size 20.

- Write your first part of the text and arrange it over your name.
Add a dropshadow.

- After this write your second part of the text and arrange it under your name.
Dropshadow it.

- Merge all visible.

- At least just add copyright info and/or watermark and save as.

Ready! ♥


Montag, 24. Mai 2010

Toxic Babe


This tutorial was written by and copyrighted to Seven on 24th April 2010.


For this tutorial you will need:

- PTU-kit Toxic from Sky Scraps which you can purchase here
- tubes of your choice (I used poser tubes which I made by myself. You can purchase these tubes here or here)
- font of your choice (I used Ahoy Distressed Mother1)


Let's start:


- Open a new canvas 600 x 550 px

- Copy and paste E8 and resize it.

- With your magic wand click inside the 3 circles and expand the selection about 5px.

- Copy and paste a paper of your choice and move this layer under the "frame layer"
Selection invert and press delete button.
Selection none.

- Highlight the frame.
With your magic wand click inside one of the circle and expand the selection about 5 px.
Highlight your paper layer.
Copy and paste a tube of your choice, resize it and arrange the face into the circle.
Selection invert and press delete.
Selection none.
Reduce the opacity to 70 % and change the mix mode to luminance (legacy)

- Repeat the above mentioned step with the other two circles.

- Highlight your frame layer and droshadow it.
Merge them visible.

- Copy and paste MetalE3, resize and dropshadow it.
Move it under your frame layer.

- Highlight your frame layer again.

- Copy and paste E7 (or an other ton), resize and dropshadow it.
Move it to the left side.

- Copy and paste your tube, resize and dropshadow it.
Position it in the middle of your tag.

- Copy and paste smock3, resiz it and move it to the ground.

- Copy and paste E27, resize and dropshadow it.
Arrange it to the left.

- Copy and paste frame1, resize and dropshadow it.
Move it over your frame to the right.

- Copy and paste the black widow, resize and dropshadow it.
Move it to the right a bit over your frame.

- Copy and paste Heart5, resize and dropshadow it.
Move it to the left.
It should looks like if it would be hanging on the mesh.

- Choose a machin colour and your font and write your name or text.
Dropshadow it.

- At least add copyright and watermark infos and save as.

Samstag, 24. April 2010

A Note

Just a short note to let you all know that I left all my CT Teams.
At the moment I don't have enough time.
But don't worry I will keep on writing tutorials :)
There a millions of freebies and I've got a huge HD with a lot of stuff to play with!

Hugs
Seven

Mittwoch, 7. April 2010

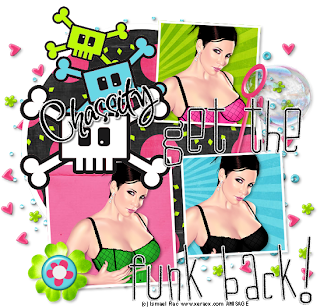
Get The Funk Back


This tutorial was written by and copyrighted to Seven on 07th April 2010

For this tutorial you will need:

- Chassity's FTU-kit The 80ies Goodie Train which you can download here
- 3 tubes of your choice (I used a cool tube of Ismael Rac which you can purchase at AMI)
- Cora's Funk Template which you can download from her blog here (It's in the second download)
- font of your choice (I used Inspiration)


Let's start:

- Open your template and duplicate it with SHIFT+D.

- Highlight the white frame of the circle and add a dropshadow.

- Highlight the circle inlay.
Selections - All - Free - Not Free.
Delete the layer.
Copy and paste a paper of your choice.
Selections - Invert.
Press delete button.
Selection none.

- Highlight one of the small rectangle frame inlays.
Selections - All - Free - Not Free.
Delete the layer.
Copy and paste a paper of your choice.
Selections - Invert.
Press delete button.
Copy and paste your first tube and arrange it your frame.
Press delete button again.
Selection - none.
Add a dropshadow to your tube.
Merge the 3 frame layers (frame, tube, frame inlay) visible and dropshadow it.

- Repeat the above mention step with the other two rectangle frames.
Add different paper and tube.

- Highlight the "skulls"
I changed the colors that they fit to my tag.
Dropshadow them.

- Copy and paste frame4, resize if necessary and dropshadow it.
Move it under your big white circle layer.

- Copy and paste element4, resize and dropshadow it.
Arrange it over frame4 under the white circle.

- Copy and paste element3, resize and dropshadow it.
Mirror it vertical and arrange it on the right side of your tage.
(I moved a part under one of the frames and one part over a second frame)

- Copy and paste element11, resize and dropshadow it.
Arrange it to the left on the edge of your rectangle frame.

- Choose your font and as background color black.
Write your name and rotate it a bit.
Change the vector to a raster layer.
Selections - All - Free - Not Free.
Expand the selection about 2 or 3.
Add a new rasterlay and fill it with white.
Selection none.
Add some noise and move it under your name.
Merge these both layers and add a small dropshadow.

- At least just add copyright/watermark infos and save as!

Dienstag, 6. April 2010

Natures Gift


This tutorial was written by and copyrighted to Seven on 06th April 2010.


For this tutorial you will need:

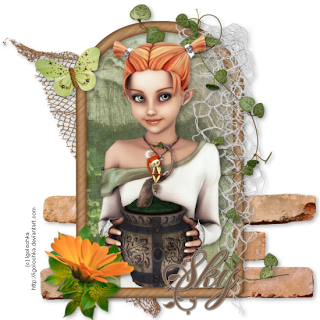
- PTU-kit Naturel from Sky Scraps which you can purchase here
- tube of your choice (I used the fantastic artwork of Igolochka)
- a nature picture of your choice (I got mine at stock.xchng)
- font of your choice (I used FleurDeLeah)


Let's start:


- Ope a new canvas 550 x 550 px.

- Copy and paste Frame9 and resize it if needed.

- With your magic wand click inside of the frame end expand the selection about 3px.

- Copy and paste a paper of your choice and move it under the frame layer.
Selection invert and press delete button.

- Copy and paste your picture and arrange it in your frame.
Press delete again.
Selection none.

- Reduce the opacity of your picture to 25-35 %.

- Dropshadow your frame.

- Copy and paste your tube and arrange it in your frame.
Erase parts of the body which are lookig throught the border below.
Dropshadow it.

- Copy and paste Element6, resize and dropshadow it.
Move this layer under your frame and paper layers and arrange it a bit to the bottom.

- Copy and paste Mesh3, resize and dropshadow it.
Arrage it under your frame a bit to the top.

- Highlight your frame layer.

- Copy and paste Mesh2, mirror it vertical and resize it.
Arrange it to the right of your frame.
Add a dropshadow.

- Copy and paste Feuillage1.
Resize and dropshadow it and arrange it also to the right over your mesh.

- Copy and paste Butterfly3, resize and dropshadow it.
Arrange it to the top on the left side.

- Copy and paste Feuillage3, resize and dropshadow it.
Move it to the edge of your frame on the left.

- Copy and paste Flower1 and resize it.
Arrange it over your feuillage and add a dropshadow.

- Choose two matching colors and your font and write your name.
Add a small dropshadow and merge all visible.

- At least add your watermark/copyright and save as.

Ready!

Mittwoch, 31. März 2010

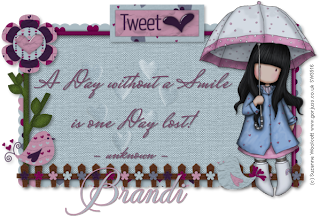
A Day without a Smile


This tutorial was written by and copyrighted to Seven on 31th March 2010.


For this tutorial you will need:

- PTU-kit Tweet Heart from Grunge and Glitter Scraps which you can purchase here
- tube of your choice (I used the fantastic artwork of Suzanne Woolcott which you can purchase here)
- 2 fonts of your choice (I used Mea Culpa and Mrs Saint-Delafield)


Let's start:


- Open a new canvas 650 x 450 px.

- Copy and paste a scalloped frame (frame5) and resize it if needed.

- With your magic wand click inside of the frame and expand the selection about 3.

- Copy and paste a paper of your choice and move it under the frame layer.
Selection invert and press delete button.
Selection none.

- Copy and paste some hearts (chromeheartcluster) and resize them.
Chance the luminance to overlay.

- Highlight your frame layer and dropshadow it.

- Copy and paste a flowersterm, resize and dropshadow it.
Move it to the left of your frame.

- Copy and paste a flowertop of your choice.
Resize it and add a dropshadow.

- Copy and paste the fence, resize and dropshadow it.
Arrange it on the border of your frame.

- Copy and paste a wordart, resize it and add a dropshadow.
Move it in the middle of the top border of your frame.

- Copy and paste your tube.
Resize it if needed and arrange it to the right.
Add a dropshadow.

- Copy and paste the birds and resize them.
Arrange one to rhe left and one to the right of your tag.
Dropshadow.

- Choose a dark matching background colour and type your text in the middle of your frame.
Add a small dropshadow.

- Choose a matching background and forgrround colour and your second font and add your name.
Dropshadow it.

- At least just add copyright/watermark infos and save as.

Ready!


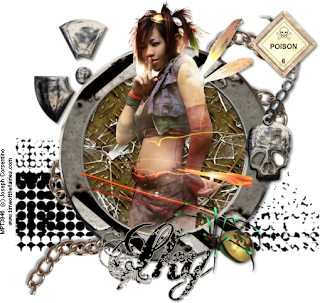
Industrial Fae


This tutorial was written by and copyrighted to Seven on 31th March 2010.


For this tutorial you will need:

- PTU-kit Toxic from Sky Scraps which you can purchase here
- tube of your choice (I used the fantastic artwork of Joseph Corsentino which you can purchase at MPT)
- font of your choice (I used Hawaii_Killer)


Let's start:


- Open a new canvas 550 x 550 px.

- Copy and paste a round frame of your choice (Frame5).
Resize it if needed.

- With your magic wand click inside of the frame.

- Copy and paste a paper of your choice and move this layer under the frame layer.
Invert the selection and press delete button.
Invert the selection again.

- Add a new raster-layer

- Copy a broken glass layer (glass2) and paste it into the selection.
Selection none.

- Add a dropshadow to your glass and frame layer.

- Copy and paste your tube.
Resize it if needed and dropshadow it.
Arrange it in your frame and erase parts of the body/legs which are looking through the border of your frame.
(see my tag above for help)

- You can merge these layers visible.

- Copy and paste E10, resize it and move this layer und your frame layers.
Arrange it a bit to the bottom.

- Copy and paste E26, resize and dropshadow it.
Arrange it to the left a little bit to the top.
Some parts should be covered under the frame layer.

- Copy and paste MetalE6, resize and dropshadow it.
Arrange it in the middle.
Parts of it should be in the right top corner and in the left lower corner.

- Highlight your frame layer.

- Copy and paste a sign (E14), resize and dropshadow it.
Arrange it to the right top corner over your chain.

- Copy and paste Skull 6.
Resize and dropshadow it.
Arrange it under your sign.

- Copy and paste the spider (blackWidow) and arrange it to the right.
Dropshadow and resize it.

- Choose two matching colours and your font and write your name or text.
Add a small dropshadow.

- At least add watermark/copyirght infos and save as.

Yeaaah! It's done!


Sonntag, 14. März 2010

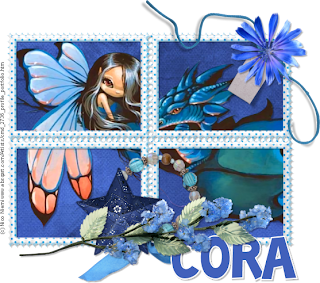
Blue


This tutorial was written by and copyrighted to Seven on 14th March 2010.


For this tutorial you will need:

- PTU-kit So Blue from Cora's Creations which you can purchase here
- tube of your choice (I used the fantastic artwork of Nico Niemi)
- font of your choice (I used ToonishRegular)

Let's start:

- Open a new canvas 600 x 550px.

- Copy and paste frame-03 and resize if necessary.

- With your magic-wand click inside the four rectangels and expand the selection about2.

- Copy and paste a paper of your choice.
Move this layer under your frame layer and invert the selection.
Press the delete button on you keybord and invert the selection again.

- Copy and paste your tube and arrange it in these four frames.
Selection invert and press delete again.
Selection none.

- Dropshadow your tube and your frame.

- Merge these layer visible.

- Copy and paste frame-01 and resize it smaller.
Rotate it about 90 degrees to the left.
Arrange it the border in the middle of your frame and add a dropshadow.

- Copy and paste the star and resize it.
Mirror it horizontal and move it over your frame-01 a little bit to the left.
Dropshadow it.

- Copy and paste flower-04 and resize it.
Move it to the boarder of your frame and dropshadow it.

- Copy and paste tag2, resize it and arrange it on the right top corner of your frame.

- Copy and paste flower-01, resize and dropshadow it.
Arrange it on the right top corner over a bit over your tag.

- Choose a bright foreground colour, a blue background color and your font.
Write your name or text and arrange it on your tag.
Dropshadow it.

- At least just add copyright and/or watermark infos and save as.

Wasn't it easy?

Samstag, 13. März 2010

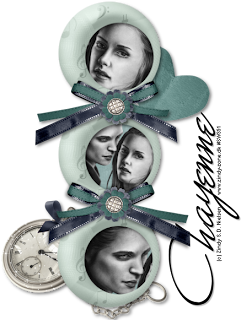
Bella and Edward


This tutorial was written by and copyrighted to Seven on 13th March 2010

Hrr Hrr, I think I'm one of the few people who don't like or who haven't ever read or seen Twilight.
I don't like cheeeeeesy Vampire Stories. Vampires are something mystical and dangerous. I prefer older vampire ones like Nosferatu, Dracula etc. Blade is very nice too. xD
But back to topic I've got a lot of lovely friends who are Twilight addicted.
So, I dedicate this tut to all my twilight loving friends!


For this tutorial you will need:

-Edward-kit from Polka Dot Scraps which you can get here
- 1 (Twilight) tube of your choice (I used the fabulous art of Zindy Nielsen. I used a free art and you can download it on her site.)
- Font of your choice (I used Monica)


Let's start:

- Open a new canvas 550x550px.
You can resize it later.

- Copy and paste frame1 and resize it if necessary.

- With your magic wand click inside of the three circles and expand the selection about 3.

- Copy and paste a paper of your choice.

- Selection invert and hit delete.
Selection none.
Move this layer under the frame layer.

- Highlight the frame layer and click with your magic wand in the first circle.
Expand the selection about 3.

- Copy and paste your tube and resize it if necessary.
Arrange Edward's or Bella's head in the circle.
Selection invert and press delete.
Selection none.
Move this layer und the frame layer.

- Repeat this step with the other 2 circles.
Add in one of them the head of the other and in the middle one both.

- Highlight your frame layer and dropshadow it.

- Merge these layers visible.

- Copy and paste a bow of your choice (element40), resize and arrange it on your frame where the first and second circle meet each other.
Duplicate this layer and mirror it vertical.
Move this layer down where the second and third layer meet each other.
Dropshadow both bows.
(See my tag above for help)

- Copy and paste a flower (element43) and resize it.
Move it over the middle of your first bow.
Duplicate and mirror the flower.
Move it over your second bow.
Dropshadow them

- Copy and paste the paperheart (element21) and mirror it vertical.
Move this layer under your frame layer.
Arrange the heart under your first circle a bit to the right.
Dropshadow it.

- Copy and paste the clock (element47) and resize it if necessary.
Move this layer under your frame layer and add a dropshadow.
Arrange in the bottom part of your tag.

- Choose a matching background colour and your font.
Write your name or text and rotate it about 90 degrees.
Add a small dropshadow and arrange it.

- At least just add copyright infos and/or watermark and save as.

Easy, hu?

Dienstag, 9. März 2010

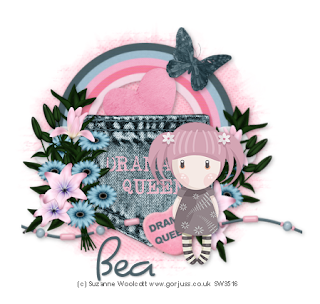
Miss Drama Queen


This tutorial was written by and copyrighted to Seven on 09th March 2010


For this tutorial you will need:

- Bea's Starry Night-kit, which you can download here.
- A tube of your choice (I used the fabulous work of Suzanne Woolcott. You can purchase her stuff here.)
- Mask of choice (I used WSL_Mask236 which you can get here)
- Font of your choice (I used Dominique)


Let's start!


- Open a new canvas 500 x 500px.

- Copy a paper of your choice and apply the mask.

- Copy and paste a rainbow and move it a bit to the top.
Resize it and add a dropshadow.

- Copy and paste a pocket (pocket02) and resize it if necessary.
Add a dropshadow and move it a bit under the rainbow.

- Copy and paste the flowers (flower01) and resize it.
Arrange it to the left of your pocket and dropshadow it.

- Duplicate this layer and mirror it.
Rotate it a bit and move this layer under the pocket layer.

- Copy and paste a paper heart, resize and dropshadow it.
Rotate it a bit of your liking and move this layer under the pocket layer a bit in the middle.
(see my tag above for help)

- Highlight your pocket layer.

- Copy and paste a beadstring and resize it.
Move it a bit to the down and add a small dropshadow.

- Copy and paste a candy heart.
Resize, rotate and dropshadow it.

- Copy and paste your tube.
Arrange it to the right over your candy heart.
Dropshadow it.

- Copy and paste a butterfly.
Resize and dropshadow it.
Arrange it on your rainbow.

- Choose a matching background colour and your font and add your name.
Give it a small dropshadow.

- At least just add copyright and/or watermark infos and save as.


Samstag, 6. März 2010

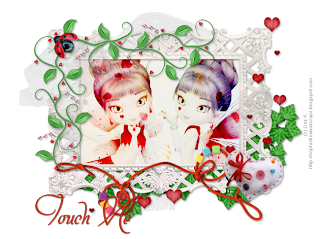
Fairy Kiss


This tutorial was written by and copyrighted to Seven on 6th March 2010.


For this tutorial you will need:

- Touch Me's PTU-kit Romantic Love which you can purchase here
- 2 fairy tubes of your choice (I used stunning posers from Lisa K.)
- font of your choice (I used Mon Amour)


Let's start:

- Open a new canvas 650 x 500px

- Copy and paste a frame (elemts_(41)) and resize if necessary.

- With your magic-wand click inside your frame and expand the selection about 2.

- Copy and paste a paper of your choice.

- Selections invert and press delete.
Selections none.

- Move this layer under the frame layer.

- Copy and paste your tubes and arrange them in your frame.
Erase the parts of them which are looking through the frame.
Add a dropshadow and their mix mode on overexpose.

- Highlight he frame layer and dropshadow it.

- Merge these layers visible

- Copy and paste the ivy (elemts_(62), resize and rotate it a bit.
Move it under the frame and add a dropshadow.

- Copy and paste the fishnet (elemts_(50)), resize a bit and add a small dropshadow.

- Highlight your frame layer.

- Copy and paste the doodled flower (elemts_(34)), resize and dropshadow it.
Move it to the left higher corner of your frame.

- Now you can decorate your tag with love or like I did:

- Copy and paste the ladybug.
Resize and dropshadow it.
Move it to the left over the flower doodle.

- Copy and paste the fishnet (elemts_(50)) again, resizeit very small and add a small dropshadow.
Move this layer to the left higher bottom under the ladybug and doodle flower.


- Copy and paste the hearts (elemts_(28)).
Resize and dropshadow it.
Arrange it to the right.

- Copy and paste the string (elemts_(70))
Move it in the middle of your frame boarder.
Resize and dropshadow it.

- Copy and paste the pillow heart (elemts_(11)) and resize it.
Move it to the right and add a dropshadow.

- Choose a matching background colour and your font and write your name or text.
Give it a small dropshadow.

- At least just add copyright info and/or watermark

Donnerstag, 4. März 2010

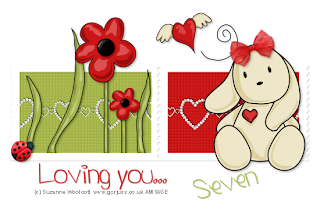
Loving You


This tutorial was written by and copyrighted to Seven on 04th March 2010.


For this tutorial you will need:

- Stamp-Frame, Bow, Ladybug, Heart-Glitter-String.
Download my supplies here
(I collected the frame, bow and heart string in several yahoo groups - if they are yours please let me know and I'll give credit or remove it. The bug is from my Saranghae kit)
- tubes of your choice (I used the fabulous Valentine Element Pack from Suzanne Woolcott. You can purchase her stuff here.)
- Xero - Frittalary
- Font of your choice (I used Yummah Strawberriez)


Let's start:

- Open a new canvas 550x360px.

- Choose two matching colours as foreground and background colour.

- Copy and paste your stamp frame and resize it if necessary.

- With your magic wand click inside of the first frame.
Expand the selection about 4 px and add a new raster layer.
Fill this layer with your first colour.
Aplly Xero - Fritilliary with the standar settings.
Selection none.
Move this layer under the frame layer.

- Repeat the above mentioned step with the other frame but this time you've to use your second colour.

- Merge the two colour rectangles.

- Copy and paste the glitter-heart-string and move it in the middle of the frames.
Erase these parts which are looking through. Add a small dropshadow.

- Highlight your frame layer and add a small dropshadow if necessary.

- Add your tube and move it to the right.
Resize and dropshadow it.

- Copy and paste the bow and arrange it on the tag.
(I added mine to the head of my tube)
Dropshadow.

- Copy and paste flowers (or whatever your using) and move them into the left frame.
Erase the parts which are looking over the border below.
Dropshadow it.

- Copy and paste the ladybug, resize and dropshadow it.
Arrange it on your tag.

- If you want you can decorate your tag with other elements.

- Choose your front and a matching colour and add your text and/or name.
Give it a small dropshadow.

- At least just add copyright and/or watermark infos and save as.

Montag, 22. Februar 2010

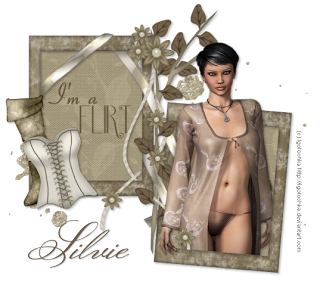
Flirt


This tutorial was written by and copyrighted to Seven on 22nd February 2010


For this tutorial you will need:

- Show Must Go On kit from Cadi's Fun Scraps which you can download here
- a tube of your choice - I am using the beautiful artwork of Igolochka
- Flirt brush or wordart of choice ( I don't knnow where I got mine, so I cannot supply)
- Font of your choice (I used Monsieur La Doulaise)


Let's get ready!


- Open a new canvas 550x550px.

- Copy and paste Frame09 and resize it.

- With the magic wand click inside of the frames and expand the selection about 3.

- Copy and paste a paper of your choice.
Invert the selection and press delete.
Selection none.
Move this layer under your frame layer.

- Copy and paste a glitter of your choice and resize it.
Move it under the frame and paper layer.

- Highlight your frame layer and dropshadow it.

- Copy and paste your tube, resize and dropshadow it.
Arrange it in the right frame and erase the body parts which are looking throught the frame boarder.
(see my tage above for help)

- Add your brush or wordart in the left frame.

- Copy and paste a boot of your choice.
Resize and dropshadow it.
Arrange it on the left side of your left frame.

- Copy and paste a corset and resize it.
Rotate it a bit and arrange it over your boot on the left side.
Add a dropshadow.

- Choose a matching background colour and your font and write your name.
Add a small dropshadow to it.

- At least just add copyright info and/or watermark and save as.


This was a quicky!

Samstag, 20. Februar 2010

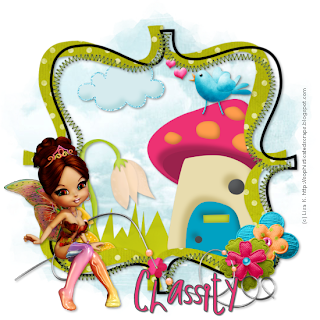
Fantasy


This tutorial was written by and copyrighted to Seven on 20th February 2010.


For this tutorial you will need:

-Fantasy-kit from Polka Dot Scraps which you can get here
- A tube of your choice (I used one of the fairies which came with the kit. They are from Lisa K.)
- Mask of choice (I used WSL_Mask220 which you can get here)
- Font of your choice (I used 2Peas THINK PINK)


Let's begin:


- Open a new canvas 550x550px.

- Copy and paste a paper of your choice and apply the mask.

- Copy and paste frame-4 and resize it.

- With your magic wand click inside of your frame, so that everything in the big green one is selected. Expand the selection about one px.

- Copy and paste the cloudy paper (paper1) and move it under your frame layer.
Invert the selection and press delete.

- Add a dropshadow to your frame.

- Highlight the paper layer.

- Copy and paste element8 (grass) resize and dropshadow it.
Arrange it a bit to the bottom and erase the parts which are looking through the frame.

- Copy and paste the house (element5) move to to the left.
Resize and add a dropshadow.
Erase the party which are looking through the frame.

- Copy and paste other elements like mushrooms, flowers, clouds, birds etc. and decorate your "picture with it"

- Highlight your frame layer.

- Copy and paste element21 (flower), resize and dropshadow it.
Arrange it on the right side of your frame.

- Copy and paste element20 (flower), resize and dropshadow it.
Arrange it to the right side a little bit over element21.

- Copy and paste element15, resize and dropshadow it.
Move it to the bottom.

- Copy and paste your tube and resize it if necessary.
Move it to the left of your frame and add dropshadow.

- Choose a darker foreground and a lighter/brighter background colour and write your name.
Dropshadow it.

- At least just add copryight infos and/or watermark and save as.

Samstag, 13. Februar 2010

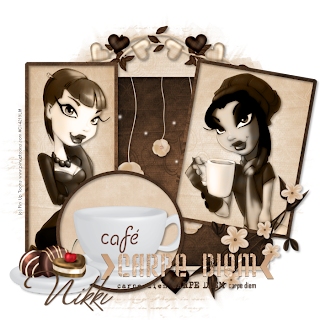
Carpe Diem


This tutorial was written by and copyrighted to Seven on 13th February 2010.


For this tutorial you will need:

- Creative Intentionz' Scrapkit "Dip Me In Choclate", which you can purchase here
- 2 Tubes of your choice. I used the fabulos work of Rion Vernon alias Pin Up Toons which you can purchase at C.I.L.M
- "Carpe Diem" Template von Tammy which you can get here
- Mask of choice (I used WSL_Mask226 which you can get here)
- a font of your choice (Monika)
- Xero - Radiance


Let's begin:

- Open the template and duplicate it with CTRL+D.
You can close the the original one.

- Delete the following layers (inclusive the shadowed ones):
"Raster17, 15, 12, 11"

- Copy and paste a paper of your choice.
Move it to the bottom.
Apply you mask.

- Highlight your mask layer.
Copy and paste HeartWreath 1 or 2 and add a small dropshadow.

- Highlight the right rectangle (Raster2).
Selections - all - free - not free
Delete this layer and add a new one.
Copy a light paper and paste it into selection.
Selection - frame selection - both sides - 4 px
Add a new raster layer and copy a darker paper.
Paste it into the selection.
Selection none.
Add a dropshadow to the frame.

- Repeat the above mentioned step with the left rectangle (Raster5), with the middle one (Raster6) and with the circle (Raster3).
In the middle one paste a darker one in the rectangle and a lighter one for the frame.

- Highlight Raster6.
Selections - all- free - not free
Copy and paste Dangler and resize it.
Selections - invert.
Hit delete.
Selections - none.
Dropshadow your dangler.

- Highlight Raster 5
Selections - all - free - not free
Copy and paste your tube.
Selections - invert and push delete.
Selection - none.
Apply Xero - Radiance with the standard settings to your tube and add a dropshadow.
Change it to luminance (legacy).

- Highlight Raster 2 and repeat the step above.
Copy and paste your second tube.

- Highlight Raster 3.
Selections - all - free - not free
Copy and paste CafeCup and arrange it
Selections - invert and push delete.
Selection - none.
Add a dropshadow.

- Highlight the wordart (Raster13) and colorize it that is matches to your tag.
Add a small dropshadow.

- Copy and paste a VineFlower, resize and dropshadow it.
Arrange it to the left side under your wording.

- Copy and paste Choclate Plate and arrange it to the right.
Resize and dropshadow it.

- If you want you can decorate your tag with some of the other beautiful elements.

- Choose a matching color and your font and write your name.
Add a small dropshadow.

- At least just add copyright info and/or watermark and save as.


Puh, we're ready!

Mittwoch, 10. Februar 2010

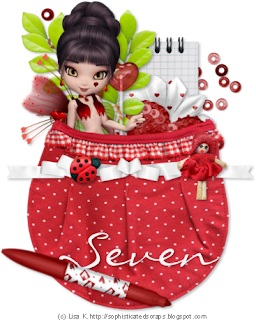
Fairy In My Pocket


This tutorial was written by and copyrighted to Seven on 10th February 2010.


For this tutorial you will need:

- My PTU-kit Saranghe which you can purchase here or here
- A fairy tube of your choice (I used the tube which came with the kit. It's a stunning poser from Lisa K.)
- font of your choice (I used Liorah BT)


Let's start:

- Open a new canvas size 500 x 500 px.
You can resize it later.

- Copy and paste the bag (bag_01), resize it and add a nice dropshadow.

- Copy and paste the beads, resize and dropshadow them and move them under the bag layer.

- Copy and paste the notelock, resize and dropshadow it.
Arrange it.

- Copy and paste a leave, resize and dropshadow it.
Move it to the left.

- Copy and paste flower or heart elements and arrange them.
Don' forget to resize and dropshadow it.

- Highlight the leaf-layer and copy and paste a lollipop.
Resize and add a dropshadow.

- Copy and paste your fairy tube.
Resize it and dropshadow.
Arrange it to a matching place "in" your bag.

-Highlight your bag layer
Make sure that all the elements and fairy are covered by the bag.

- Copy and paste a ribbon (ribbon02) and resize it.
Arrange it over your bag and dropshadow it.

- Copy and paste the doll and the ladybug or other elements.
Resize and dropshadow them.
Arrange them over your bag and ribbon.

- Copy and paste the marker and resize it.
Move it a little bit of the lower part of the bag.
Rotate it and drophadow it a bit.

- Set a matching background color and choose your font.
Write your name and add a dropshadow.

- At least just add copyright infos and/or watermark and save as.

This was easy, or?


Samstag, 6. Februar 2010

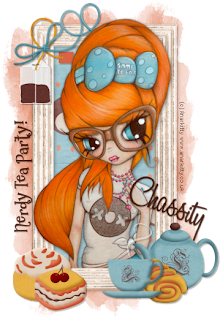
Nerdy Tea Party


This tutorial was written by and copyrighted to Seven on 06th February 2010

For this tutorial you will need:

- Chassity's FTU-kit Tea Time which you can download here
- A tube of your choice (I used a cool tube of Anarkitty)
- Mask of choice (I used WSL_Mask254 which you can get here)
- two fonts of your choice (I used 2Peas Mr Giggles and A&S Black Swan)


Let's start:

- Open a new canvas 550x550 px.
You can resize it later.

- Copy and paste a paper of your choice and apply the mask.
(I made mine a bit smaller after I added the frame.)

- Copy and paste a frame (frame-12, 13, 14, 15 or 16) resize it and rotate it about 90 degrees.

- With your magic wand click inside the frame and expand the selections about 5.

- Copy and paste a paper of your choice, move it under the frame layer and invert the selection.
Press delete.
Selection none.

- Highlight your frame layer and dropshadow it.

- Copy and paste your tube, resize it and move it in the middle of your frame.
Erase parts of the body which are looking over the boarder below.
Dropshadow your tube.

- Copy and paste coffee pot, coffee cup and the cakes.
Resize and dropshadow them.
Arrange them on your tag.

- Copy and paste a tea bag, resize and dropshadow it.
Move it to the left higher corner.

- Copy and paste a bow of your choice.
Resize and dropshadow it.
Move it to the left ver your tea bag.

- Choose a matching background colour and your font.
Write your text (Nerdy Tea Party) and rotate it about 90 degrees.
Add a small dropshadow and position it near your frame.

- Choose your second font and write your name.
Dropshadow i and arrange it.

- At least add copyright infos and/or watermark and save as.


Pretty easy, or?

Samstag, 30. Januar 2010

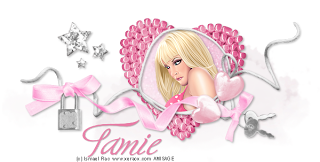
Tamie's Valentine


This tutorial was written by and copyrighted to Seven on 30th January 2010.


For this tutorial you will need:

-Cupid-kit from Addictive Pleasures which you can get here
- A tube of your choice (I used a fabulous tube of Ismael Rac which you can purchase at AMI)
- Font of your choice (I used Ministry Script Stylistic HFF)


Let's begin:


- Open a new canvas 600 x 400px.

- Copy and paste ele58 and resize it if necessary.

- With your magic wand click inside of the circle and expand the selection about 2.

- Copy and paste a paper of your choice.
Invert the selection and hit delete button.
Invert again.

- Copy and paste the tube of your choice, resize if necessary and arrange the face (or whatever part you like) in the the center of the circle.
Invert the selection and press the delete button.
Selection none.

- Add a small dropshadow to your tube and ribbon-frame-layer.
Merge these 3 layers visible.

- Copy and paste the cloud (ele63) and move it under your frame-layer.
Resize it a bit.

- Copy and paste a heart (ele9) and resize it if necessary.
Move this heart under the circle of your ribbon-frame.
Add a dropshadow.

- Copy and paste the glitter stars (ele44).
Resize and dropshadow them.
Move it a bit to the left.

- Highlight your ribbon layer

- Copy and paste ele88, resize and dropshadow it.
Arrange it on your ribbon, that every knot of the bows is touching the string from the frame.

- Copy and paste the glass hearts (ele25), resize and dropshadow them.
Arrange them to the right a little bit over the bow of the frame.

- Choose a nice maching colour and font and write your name.

- At least just add Copyright and watermark infos and save as.

Ready ♥

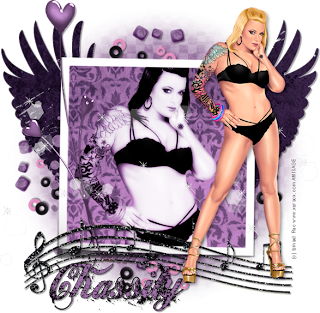
Violet Rock


his tutorial was written by and copyrighted to Seven on 30th January 2010.


For this tutorial you will need:

-Unlikely Ballad-kit from Polka Dot Scraps which you can get here
- A tube of your choice (I used a fabulous tube of Ismael Rac which you can purchase at AMI)
- PlugIn Xero - Radiance
- Mask of choice (I used WSL_Mask208 which you can get here)
- Font of your choice (I used HawaiiLover)

Let's begin:

- Open a new canvas 600x600 px.

- Copy and paste frame02 and resize it.

- With your magic wand click inside of the frame and expand the selections about 5px.

- Copy and paste a paper of your choice.
Invert the selection and press delete.
Invert the selection again.

- Move this layer under the frame layer.

- Copy and paste your tube and arrange it in the frame.
Selection invert and press delete.
Selection none.

- Apply the Xero Radiance Plugin with the standard settings

- Change the opacity of your tube on luminance (legacy).

- Merge these 3 layers and add a dropshadow.

- Copy and paste another paper of your choice.
Move it below your picture layer and apply the mask.

- Copy and paste element19 and resize it.
Move it a bit to the top and add adropshadow.

- Duplicate this layer and mirror it horizontal.
Merge the two element layer and duplicate it again.
Rotate it about 90 degrees.

- Copy and paste element23, resize and dropshadow it.

- Highlight your frame/picture layer.

- Copy and paste element46, arange it and resize it if necessary.

- Copy and paste element16, resize and dropshadow it.
Mirror it and move it to the left side of your picture.
I also coloured it violet.

- Copy and paste element25 and resize it.
Move it to the boarder of your frame and add a small dropshadow.

- Copy and paste your tube and resize it if necessary.
Move it to the right side of your frame/picture.
Add a dropshadow.

- Choose black as foreground and a maching colour as background colour and write your name.
Add a small dropshadow.

- At least just add copyright infos and/or watermark and save as.

Sonntag, 24. Januar 2010

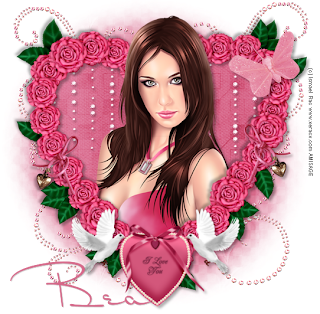
Pink Valentine


This tutorial was written by and copyrighted to Seven on 24th January 2010.


For this tutorial you will need:

-Always in Love-kit from Bea Creations which you can get at Twilight Scraps
(It's her part of the january store collab kit)
- A tube of your choice (I used a fabulous tube of Ismael Rac which you can purchase at AMI)
Mask of choice (I used WSL_Mask208 which you can get here)
- Font of your choice (I used Dr.Crabfeld)


Let's start:

- Open a new canvas 550x550px.

- Copy and paste a paper of your choice and apply the mask.

- Copy and paste the rose-heart-frame (frame04) and resize it.

- With your magice wand click inside the center of your frame and expand the selection about 5px.

- Copy and paste another paper of your choice.
Move it under the frame layer.

- Invert the selection and press delete.
Invert the selection again.

- Copy and paste the glitterrain (deco04) and arrange it in your frame.
Selection invert and press delete.
Selection none.
Add a small dropshadow to your glitter.

- Dropshadow your frame.

- Copy and paste bling02 and move it under the paper layer.
Duplicate it 3 times (you should have 4 blings now) and arrange them for your liking.
Add a small dropshadow.

- Copy and paste your tube, resize and dropshadow it.
Arrange it in your frame.
Erase parts of the body which are looking over the frame.
(see my tag for help)

- Copy and paste the doves with heart (dovewithheart01), resize and dropshadow it.
Move it to the cusp of your heart.

- Copy and paste a butterfly (butterfly05) resize and rotate it abit.
Arrange it on your frame and add a dropshadow.

- Copy and paste the bow with the bell (heart05) and resize it.
Move it to the right middle boarder of your heart-frame.
Add a small dropshadow.

- Duplicate this layer and mirror it.

- Add your name to the tag.

- At least just add copyright infos and/or watermark and save as.


Samstag, 9. Januar 2010

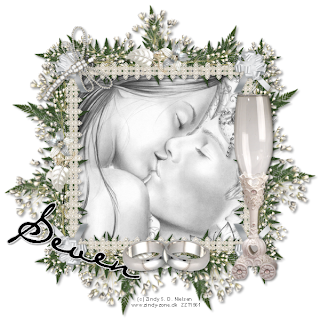
I Do


This tutorial was written by and copyrighted to Seven on 09th January 2010


For this tutorial you will need:

- Design by Ali's I DO -kit which you can get here
- 1 couple-tube of your choice (I used the fabulous art of Zindy Nielsen, which you can buy at her own shop.)
- Font of your choice (I used Diva)


Let's start!

- Open a new canvas 600x600 px.

- Copy and paste Frame3, resize it and add a soft dropshadow.

- Copy and paste Frame2 and resize it.

- With your magic tool click inside of the frame and expand the selection about 7 px.

- Copy and paste a paper of your choice.
Invert the selection and press delete.

- Invert selection again.

- Copy and paste your tube and move it in the middle of your frame.
Invert the selection and press delete.

- Selection none

- Move the paper and tube layer under the frame2 layer.

- Add a soft dropshadow to your frame.

- Copy and paste Silver Wedding Band 2 (ring) and roate it about 90 degrees.
Resize it.

- Duplicate this layer and mirror it.

- Postion the two rings in the middle of your frame border.
Merge them together and add a dropshadow.

- Now you can decorate your tag as you wish or like I do:

- Copy and paste the Crystal Dragonfly, resize it and roate it a bit.
Move it to the left upper edge and add a small dropshadow.

- Copy and paste the Wedding Glas1, resize and position it to the right side.
Dropshadow it softly.

- Choose a lighter forground colour, a darker background colour and your font and add your name or text.

- Dropshadow it softly.

- At least just add copyright information and/or watermark and save as.

Ready!


Sonntag, 3. Januar 2010

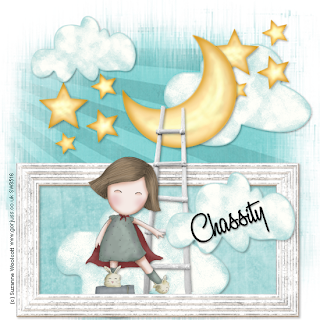
Let's visit the Moon


This tutorial was written by and copyrighted to Seven on 03rd January 2009


For this tutorial you will need:

- Chassity's Starry Night-kit, which you can get exclusively here.
- A tube of your choice (I used the fabulous work of Suzanne Woolcott. You can purchase her stuff here.)
- Mask of choice (I used WSL_Mask39 which you can get here)
- Font of your choice (I used A&S Black Swan)


Let's start:

- Open a new canvas 550x550 px

- Copy and paste a paper of your choice and apply the mask.
(I enlarged the mask about 115%)
Reduce the oppacity a bit.

- Copy and paste frame5, resize and move it to the ground.

- With your magic wand click inside of the frame and expand the selection about 5.

- Copy and paste a paper of your choice, invert the selection and press delete.
Selection none.
Move this layer under the frame layer.

- Highlight your frame layer.
Dropshadow it.

- Copy and paste the clouds (element1 & element2).
Resize them, duplicate them and decorate your tag with them.
I used two in the "sky" (the part over your frame), one in the frame and one over the frame.

- Copy and paste the stars (element43), resize it an duplicate it.
Arrange them in the "sky" and add a dropshadow.

- Copy and paste the moon (element44) and resize it.
Mirror it and rotate it a bit.
Dropshadow it.

- Copy and paste the ladder (element7), resize and dropshadow it.
Arrange it in the middle of your tag.
The bottom part shoul touch the frame and the higher part should touch the moon.

- Copy and paste your tube, resize and dropshadow it.
Postion it in front of the ladder.

- Choose your font and write your name on one of the cloud.
Add a dropshadow.

- At least just add copyright and/or watermark and save as.

Ready!


TOU

All tutorials are written by myself and any resemblance to any other tutorial is purely coincidental.
You are allowed to make tags, stats, layout what ever your want with them.
You are not allowed to make any monetary gain with them.
You are not allowed to hotlink.
I do not allow to translate it whithout my written permission!


It would be great if you mail me your results at coroners.sun@gmail.com

  © Blogger template Ramadhan Al-Mubarak by Ourblogtemplates.com 2008

Back to TOP