Freitag, 24. September 2010

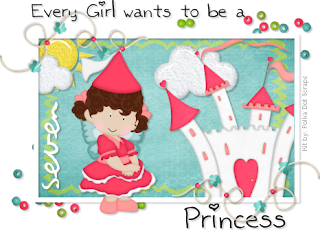
Every Girl wants to be a Princess


This tutorial was written by and copyrighted to Seven on 24th September 2010.

Some ppl asked me if there's a tut for my little tag but it wasn't until today! ;)

For this tutorial you will need:

- Chassity's PTU-kit My Doll kit
- 2 fonts of your choice (I used Kaileen and violation)


Let's begin:


- Open a new canvas 500 x 400 px ( you can crop it later).

- Choose white as your foreground colour and none as background colour.

- With your rectangle (stroke 5 or 6) draw out a rectangle in the middle of your canvas.
Change this layer into a raster lay.

- Use your magic wand and click inside of the rectangel.
Expand the selection about 3.

- Copy and paste a paper of your choice.

- Invert the selection and press delete button on your keyboard.
Selection none.

- Move this layer under your frame layer.

- Highlight your frame layer and add a small matching dropshadow.

- Highlight your paper layer

- Copy and paste the castle, sun and cloud over your paper layer and arrange them
(you will have to resize and maybe rotate them)
Dropshadow them slightly.

- Copy and paste the beads (element43), resize and dropshadow them.
Move this layer under the paper layer.

- Arrange your beads to the right lower edge.

- Duplicate this layer

- Mirror vertical
Mirror horizontal.

- Highlight your frame layer

- Copy and paste the beadstring (element44), resize and dropshadow it.
Arrange it to the right upper boarder of the frame.

- Duplicate this layer.

- Mirror vertical
Mirror horizontal

- Copy and paste one of the fairy princesses (element1 or element2), resize and dropshadow it.
Move it over your tag a little bit to the right side.

- Choose black as your background colour and your first font (Kaileen)
Add your text.
Change vector to raster layer and dropshadow it slightly.

- Highlight your paper layer.

- Choose white as your background colour and your second font (violation)
Type your name and change it to a raster layer.
Dropshadow it.

- Rotate this layer abot 90 degrees and arrange it in your tag.

- Resize/crop and add watermark/copyright sign and save as.

Ready!

I hope you understand everything, It's a long time ago when I wrote a tutorial! *loool*
Montag, 2. August 2010

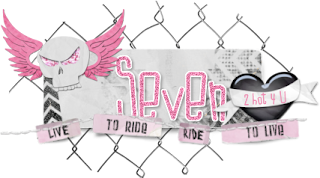
2 Hot 4 U


This tutorial was written by and copyrighted to Seven on 02nd August 2010.

This is a really quick and easy tag :D


For this tutorial you will need:

- Tammy's part of Biker Babe Collab (purchaseable at PMTWS)
- font of your choice ( I used LDJ JillyNilly)


Let's begin:

- Open journalpiece and duplicate it with Shift+D
Enlarge the canvas about 450 x 300 px

- Copy and paste wordart1 and resize it.
Arrange it over the tag to the bottom

- Copy and paste one of the skulls with wings (skull-pinkgem) and resize it.
Move it to the left over the screw of your tag.

- Highlight your tag-layer and copy and paste one of the hearts with banner (heartbanner-blkplain).
Resize it and move it to the right, a little bit under the wordart.

- Choose a matching background colour and your font and write "2 Hot 4 U" or a text of your choice over the banner.
Convert to raster layer

- Highlight your tag again.

- Write your name on it and add a picture noise effect of your choice.
Convert to raster layer.

- Select all - free - not free and espand the selection about 2.
Add a new raster layer and fill it with white.
Move this layer under your name.
Selection none.
Add a small dropshadow.

- Merge all layer visible and save as.

HURRAY!

I'm back back back back back back back back! *dance*

And I'm happy!

I've got the world best Mum and world best Uncle!
They rescued my PC and most of my datas!
Woohoooo! I just lost things which were on my C harddrive :D
And this wasn't that much! :S

Whoooot Whoooot!

That's great :D

At the moment I'm installing and installing! :S


Thank you all for you help offers and lovely mails!
You're great!

Seven

Montag, 26. Juli 2010

ATTN - I lost everything

My Dears,

I don't know when I will be back.
My PC got a Trojan on my harddrive and it toally crashed my PC.
We wasn't able to repair or rescue any of my datas.
I'm so sad.
I lost hundreds of personal/private photos, datas, 10 GB CU Items, 10 GB PTU-Toobs, Things to create Poser Toobs and many many other stuff. I have lost more than 100 GB.
I don't have any toob to play with and I don't have one CU Item to create a new kit.
I lost all my selfmade stationaries.
Everything.
I am so sad about it, because it was one of my biggest hobbies.
Photography and Graphic.
At the moment I am not able to repurchase anything etc. because I'm still going to school and therefore I don't have enough money for it.

I just wanted to let you know that I don't know when I will be back in creating or when I'm back online because we don't know when my PC will be okay again.

I really miss to create and to talk to all of you guys.

Hugs and Kisses
Seven

P.S.: You can reach me at sarahgeisler1987 at gmail.com

Dienstag, 22. Juni 2010

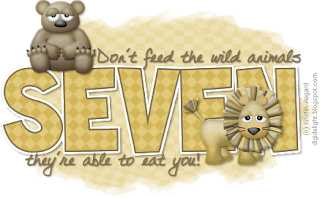
Don't feed


This tutorial was written by and copyrighted to Seven on 22th June 2010.

Some monthes a go I saw a taggie which looks nearly the same and I fell in love with it. *lol*
I asked the owner of it if there's a tut and she said no.
So I decided (and asked) if it's okay to made a tag (tut) which looks a bit like this but mostly with some of my ideas in it and I got the o.k. :)
Thank you so much Kathy!!! ♥


For this tutorial you will need:

- 2 small animal tubes (the ones I used are from the beautiful "Zoo Day" kit from Kristin Aagard)
- 2 fonts of your choice, a bigger one and a handwritten one (I used ToonRegular and DJBDiane)
- Mask of choice (I used WSL_Mask218 which you can get here)
- a pattern of your choice


Let's begin:

- Open a new canvas 500 x 350 px (if your name is longer you maybe have to use a larger width).

- Choose a darker colour for your foreground and a lighter colour for your background.

- Add a new raster layer and fill it with your lighter colour.
Apply your mask.

- Choose your text tool and your bigger font.
Font size 100 and stroke size 2.
Write your name and change the vector layer into a raster lay.

- Selection - All - Free and expand the selection about 3.

- Add a new raster layer and fill it with white.

- Selection none.

- Move the white layer under your name layer and add a dropshadow.

- Merge these 2 layers visible.

- Highlight your name and click with your magic wand inside of every letter which are in your lighter color.

- Add a new raster layer and fill it with your pattern.
Change it to soft light and reduce the opacity to 25

- Selection none.

- Merge these two layers visible.

- Copy and paste your tubes, resize them and arrange them on your tag.
Add a small dropshadow to them.

- Use your text tool again.
Change your background to your darker colour (no foreground colour).
Font size 20.

- Write your first part of the text and arrange it over your name.
Add a dropshadow.

- After this write your second part of the text and arrange it under your name.
Dropshadow it.

- Merge all visible.

- At least just add copyright info and/or watermark and save as.

Ready! ♥


Montag, 24. Mai 2010

Toxic Babe


This tutorial was written by and copyrighted to Seven on 24th April 2010.


For this tutorial you will need:

- PTU-kit Toxic from Sky Scraps which you can purchase here
- tubes of your choice (I used poser tubes which I made by myself. You can purchase these tubes here or here)
- font of your choice (I used Ahoy Distressed Mother1)


Let's start:


- Open a new canvas 600 x 550 px

- Copy and paste E8 and resize it.

- With your magic wand click inside the 3 circles and expand the selection about 5px.

- Copy and paste a paper of your choice and move this layer under the "frame layer"
Selection invert and press delete button.
Selection none.

- Highlight the frame.
With your magic wand click inside one of the circle and expand the selection about 5 px.
Highlight your paper layer.
Copy and paste a tube of your choice, resize it and arrange the face into the circle.
Selection invert and press delete.
Selection none.
Reduce the opacity to 70 % and change the mix mode to luminance (legacy)

- Repeat the above mentioned step with the other two circles.

- Highlight your frame layer and droshadow it.
Merge them visible.

- Copy and paste MetalE3, resize and dropshadow it.
Move it under your frame layer.

- Highlight your frame layer again.

- Copy and paste E7 (or an other ton), resize and dropshadow it.
Move it to the left side.

- Copy and paste your tube, resize and dropshadow it.
Position it in the middle of your tag.

- Copy and paste smock3, resiz it and move it to the ground.

- Copy and paste E27, resize and dropshadow it.
Arrange it to the left.

- Copy and paste frame1, resize and dropshadow it.
Move it over your frame to the right.

- Copy and paste the black widow, resize and dropshadow it.
Move it to the right a bit over your frame.

- Copy and paste Heart5, resize and dropshadow it.
Move it to the left.
It should looks like if it would be hanging on the mesh.

- Choose a machin colour and your font and write your name or text.
Dropshadow it.

- At least add copyright and watermark infos and save as.

Samstag, 24. April 2010

A Note

Just a short note to let you all know that I left all my CT Teams.
At the moment I don't have enough time.
But don't worry I will keep on writing tutorials :)
There a millions of freebies and I've got a huge HD with a lot of stuff to play with!

Hugs
Seven

TOU

All tutorials are written by myself and any resemblance to any other tutorial is purely coincidental.
You are allowed to make tags, stats, layout what ever your want with them.
You are not allowed to make any monetary gain with them.
You are not allowed to hotlink.
I do not allow to translate it whithout my written permission!


It would be great if you mail me your results at coroners.sun@gmail.com

  © Blogger template Ramadhan Al-Mubarak by Ourblogtemplates.com 2008

Back to TOP