Mittwoch, 31. März 2010

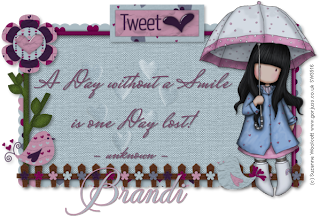
A Day without a Smile


This tutorial was written by and copyrighted to Seven on 31th March 2010.


For this tutorial you will need:

- PTU-kit Tweet Heart from Grunge and Glitter Scraps which you can purchase here
- tube of your choice (I used the fantastic artwork of Suzanne Woolcott which you can purchase here)
- 2 fonts of your choice (I used Mea Culpa and Mrs Saint-Delafield)


Let's start:


- Open a new canvas 650 x 450 px.

- Copy and paste a scalloped frame (frame5) and resize it if needed.

- With your magic wand click inside of the frame and expand the selection about 3.

- Copy and paste a paper of your choice and move it under the frame layer.
Selection invert and press delete button.
Selection none.

- Copy and paste some hearts (chromeheartcluster) and resize them.
Chance the luminance to overlay.

- Highlight your frame layer and dropshadow it.

- Copy and paste a flowersterm, resize and dropshadow it.
Move it to the left of your frame.

- Copy and paste a flowertop of your choice.
Resize it and add a dropshadow.

- Copy and paste the fence, resize and dropshadow it.
Arrange it on the border of your frame.

- Copy and paste a wordart, resize it and add a dropshadow.
Move it in the middle of the top border of your frame.

- Copy and paste your tube.
Resize it if needed and arrange it to the right.
Add a dropshadow.

- Copy and paste the birds and resize them.
Arrange one to rhe left and one to the right of your tag.
Dropshadow.

- Choose a dark matching background colour and type your text in the middle of your frame.
Add a small dropshadow.

- Choose a matching background and forgrround colour and your second font and add your name.
Dropshadow it.

- At least just add copyright/watermark infos and save as.

Ready!

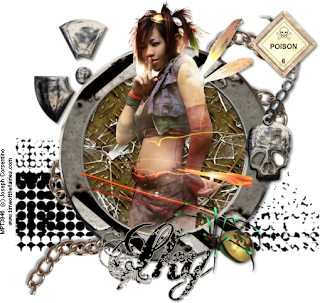
Industrial Fae


This tutorial was written by and copyrighted to Seven on 31th March 2010.


For this tutorial you will need:

- PTU-kit Toxic from Sky Scraps which you can purchase here
- tube of your choice (I used the fantastic artwork of Joseph Corsentino which you can purchase at MPT)
- font of your choice (I used Hawaii_Killer)


Let's start:


- Open a new canvas 550 x 550 px.

- Copy and paste a round frame of your choice (Frame5).
Resize it if needed.

- With your magic wand click inside of the frame.

- Copy and paste a paper of your choice and move this layer under the frame layer.
Invert the selection and press delete button.
Invert the selection again.

- Add a new raster-layer

- Copy a broken glass layer (glass2) and paste it into the selection.
Selection none.

- Add a dropshadow to your glass and frame layer.

- Copy and paste your tube.
Resize it if needed and dropshadow it.
Arrange it in your frame and erase parts of the body/legs which are looking through the border of your frame.
(see my tag above for help)

- You can merge these layers visible.

- Copy and paste E10, resize it and move this layer und your frame layers.
Arrange it a bit to the bottom.

- Copy and paste E26, resize and dropshadow it.
Arrange it to the left a little bit to the top.
Some parts should be covered under the frame layer.

- Copy and paste MetalE6, resize and dropshadow it.
Arrange it in the middle.
Parts of it should be in the right top corner and in the left lower corner.

- Highlight your frame layer.

- Copy and paste a sign (E14), resize and dropshadow it.
Arrange it to the right top corner over your chain.

- Copy and paste Skull 6.
Resize and dropshadow it.
Arrange it under your sign.

- Copy and paste the spider (blackWidow) and arrange it to the right.
Dropshadow and resize it.

- Choose two matching colours and your font and write your name or text.
Add a small dropshadow.

- At least add watermark/copyirght infos and save as.

Yeaaah! It's done!


Sonntag, 14. März 2010

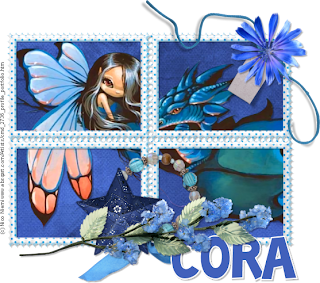
Blue


This tutorial was written by and copyrighted to Seven on 14th March 2010.


For this tutorial you will need:

- PTU-kit So Blue from Cora's Creations which you can purchase here
- tube of your choice (I used the fantastic artwork of Nico Niemi)
- font of your choice (I used ToonishRegular)

Let's start:

- Open a new canvas 600 x 550px.

- Copy and paste frame-03 and resize if necessary.

- With your magic-wand click inside the four rectangels and expand the selection about2.

- Copy and paste a paper of your choice.
Move this layer under your frame layer and invert the selection.
Press the delete button on you keybord and invert the selection again.

- Copy and paste your tube and arrange it in these four frames.
Selection invert and press delete again.
Selection none.

- Dropshadow your tube and your frame.

- Merge these layer visible.

- Copy and paste frame-01 and resize it smaller.
Rotate it about 90 degrees to the left.
Arrange it the border in the middle of your frame and add a dropshadow.

- Copy and paste the star and resize it.
Mirror it horizontal and move it over your frame-01 a little bit to the left.
Dropshadow it.

- Copy and paste flower-04 and resize it.
Move it to the boarder of your frame and dropshadow it.

- Copy and paste tag2, resize it and arrange it on the right top corner of your frame.

- Copy and paste flower-01, resize and dropshadow it.
Arrange it on the right top corner over a bit over your tag.

- Choose a bright foreground colour, a blue background color and your font.
Write your name or text and arrange it on your tag.
Dropshadow it.

- At least just add copyright and/or watermark infos and save as.

Wasn't it easy?

Samstag, 13. März 2010

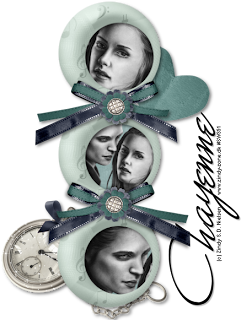
Bella and Edward


This tutorial was written by and copyrighted to Seven on 13th March 2010

Hrr Hrr, I think I'm one of the few people who don't like or who haven't ever read or seen Twilight.
I don't like cheeeeeesy Vampire Stories. Vampires are something mystical and dangerous. I prefer older vampire ones like Nosferatu, Dracula etc. Blade is very nice too. xD
But back to topic I've got a lot of lovely friends who are Twilight addicted.
So, I dedicate this tut to all my twilight loving friends!


For this tutorial you will need:

-Edward-kit from Polka Dot Scraps which you can get here
- 1 (Twilight) tube of your choice (I used the fabulous art of Zindy Nielsen. I used a free art and you can download it on her site.)
- Font of your choice (I used Monica)


Let's start:

- Open a new canvas 550x550px.
You can resize it later.

- Copy and paste frame1 and resize it if necessary.

- With your magic wand click inside of the three circles and expand the selection about 3.

- Copy and paste a paper of your choice.

- Selection invert and hit delete.
Selection none.
Move this layer under the frame layer.

- Highlight the frame layer and click with your magic wand in the first circle.
Expand the selection about 3.

- Copy and paste your tube and resize it if necessary.
Arrange Edward's or Bella's head in the circle.
Selection invert and press delete.
Selection none.
Move this layer und the frame layer.

- Repeat this step with the other 2 circles.
Add in one of them the head of the other and in the middle one both.

- Highlight your frame layer and dropshadow it.

- Merge these layers visible.

- Copy and paste a bow of your choice (element40), resize and arrange it on your frame where the first and second circle meet each other.
Duplicate this layer and mirror it vertical.
Move this layer down where the second and third layer meet each other.
Dropshadow both bows.
(See my tag above for help)

- Copy and paste a flower (element43) and resize it.
Move it over the middle of your first bow.
Duplicate and mirror the flower.
Move it over your second bow.
Dropshadow them

- Copy and paste the paperheart (element21) and mirror it vertical.
Move this layer under your frame layer.
Arrange the heart under your first circle a bit to the right.
Dropshadow it.

- Copy and paste the clock (element47) and resize it if necessary.
Move this layer under your frame layer and add a dropshadow.
Arrange in the bottom part of your tag.

- Choose a matching background colour and your font.
Write your name or text and rotate it about 90 degrees.
Add a small dropshadow and arrange it.

- At least just add copyright infos and/or watermark and save as.

Easy, hu?

Dienstag, 9. März 2010

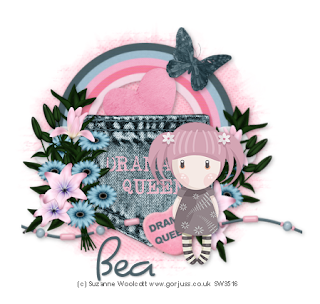
Miss Drama Queen


This tutorial was written by and copyrighted to Seven on 09th March 2010


For this tutorial you will need:

- Bea's Starry Night-kit, which you can download here.
- A tube of your choice (I used the fabulous work of Suzanne Woolcott. You can purchase her stuff here.)
- Mask of choice (I used WSL_Mask236 which you can get here)
- Font of your choice (I used Dominique)


Let's start!


- Open a new canvas 500 x 500px.

- Copy a paper of your choice and apply the mask.

- Copy and paste a rainbow and move it a bit to the top.
Resize it and add a dropshadow.

- Copy and paste a pocket (pocket02) and resize it if necessary.
Add a dropshadow and move it a bit under the rainbow.

- Copy and paste the flowers (flower01) and resize it.
Arrange it to the left of your pocket and dropshadow it.

- Duplicate this layer and mirror it.
Rotate it a bit and move this layer under the pocket layer.

- Copy and paste a paper heart, resize and dropshadow it.
Rotate it a bit of your liking and move this layer under the pocket layer a bit in the middle.
(see my tag above for help)

- Highlight your pocket layer.

- Copy and paste a beadstring and resize it.
Move it a bit to the down and add a small dropshadow.

- Copy and paste a candy heart.
Resize, rotate and dropshadow it.

- Copy and paste your tube.
Arrange it to the right over your candy heart.
Dropshadow it.

- Copy and paste a butterfly.
Resize and dropshadow it.
Arrange it on your rainbow.

- Choose a matching background colour and your font and add your name.
Give it a small dropshadow.

- At least just add copyright and/or watermark infos and save as.


Samstag, 6. März 2010

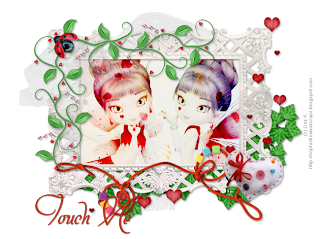
Fairy Kiss


This tutorial was written by and copyrighted to Seven on 6th March 2010.


For this tutorial you will need:

- Touch Me's PTU-kit Romantic Love which you can purchase here
- 2 fairy tubes of your choice (I used stunning posers from Lisa K.)
- font of your choice (I used Mon Amour)


Let's start:

- Open a new canvas 650 x 500px

- Copy and paste a frame (elemts_(41)) and resize if necessary.

- With your magic-wand click inside your frame and expand the selection about 2.

- Copy and paste a paper of your choice.

- Selections invert and press delete.
Selections none.

- Move this layer under the frame layer.

- Copy and paste your tubes and arrange them in your frame.
Erase the parts of them which are looking through the frame.
Add a dropshadow and their mix mode on overexpose.

- Highlight he frame layer and dropshadow it.

- Merge these layers visible

- Copy and paste the ivy (elemts_(62), resize and rotate it a bit.
Move it under the frame and add a dropshadow.

- Copy and paste the fishnet (elemts_(50)), resize a bit and add a small dropshadow.

- Highlight your frame layer.

- Copy and paste the doodled flower (elemts_(34)), resize and dropshadow it.
Move it to the left higher corner of your frame.

- Now you can decorate your tag with love or like I did:

- Copy and paste the ladybug.
Resize and dropshadow it.
Move it to the left over the flower doodle.

- Copy and paste the fishnet (elemts_(50)) again, resizeit very small and add a small dropshadow.
Move this layer to the left higher bottom under the ladybug and doodle flower.


- Copy and paste the hearts (elemts_(28)).
Resize and dropshadow it.
Arrange it to the right.

- Copy and paste the string (elemts_(70))
Move it in the middle of your frame boarder.
Resize and dropshadow it.

- Copy and paste the pillow heart (elemts_(11)) and resize it.
Move it to the right and add a dropshadow.

- Choose a matching background colour and your font and write your name or text.
Give it a small dropshadow.

- At least just add copyright info and/or watermark

Donnerstag, 4. März 2010

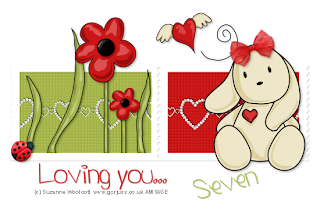
Loving You


This tutorial was written by and copyrighted to Seven on 04th March 2010.


For this tutorial you will need:

- Stamp-Frame, Bow, Ladybug, Heart-Glitter-String.
Download my supplies here
(I collected the frame, bow and heart string in several yahoo groups - if they are yours please let me know and I'll give credit or remove it. The bug is from my Saranghae kit)
- tubes of your choice (I used the fabulous Valentine Element Pack from Suzanne Woolcott. You can purchase her stuff here.)
- Xero - Frittalary
- Font of your choice (I used Yummah Strawberriez)


Let's start:

- Open a new canvas 550x360px.

- Choose two matching colours as foreground and background colour.

- Copy and paste your stamp frame and resize it if necessary.

- With your magic wand click inside of the first frame.
Expand the selection about 4 px and add a new raster layer.
Fill this layer with your first colour.
Aplly Xero - Fritilliary with the standar settings.
Selection none.
Move this layer under the frame layer.

- Repeat the above mentioned step with the other frame but this time you've to use your second colour.

- Merge the two colour rectangles.

- Copy and paste the glitter-heart-string and move it in the middle of the frames.
Erase these parts which are looking through. Add a small dropshadow.

- Highlight your frame layer and add a small dropshadow if necessary.

- Add your tube and move it to the right.
Resize and dropshadow it.

- Copy and paste the bow and arrange it on the tag.
(I added mine to the head of my tube)
Dropshadow.

- Copy and paste flowers (or whatever your using) and move them into the left frame.
Erase the parts which are looking over the border below.
Dropshadow it.

- Copy and paste the ladybug, resize and dropshadow it.
Arrange it on your tag.

- If you want you can decorate your tag with other elements.

- Choose your front and a matching colour and add your text and/or name.
Give it a small dropshadow.

- At least just add copyright and/or watermark infos and save as.

TOU

All tutorials are written by myself and any resemblance to any other tutorial is purely coincidental.
You are allowed to make tags, stats, layout what ever your want with them.
You are not allowed to make any monetary gain with them.
You are not allowed to hotlink.
I do not allow to translate it whithout my written permission!


It would be great if you mail me your results at coroners.sun@gmail.com

  © Blogger template Ramadhan Al-Mubarak by Ourblogtemplates.com 2008

Back to TOP