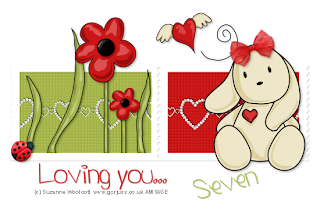
This tutorial was written by and copyrighted to Seven on 04th March 2010.
For this tutorial you will need:
- Stamp-Frame, Bow, Ladybug, Heart-Glitter-String.
Download my supplies here
(I collected the frame, bow and heart string in several yahoo groups - if they are yours please let me know and I'll give credit or remove it. The bug is from my Saranghae kit)
- tubes of your choice (I used the fabulous Valentine Element Pack from Suzanne Woolcott. You can purchase her stuff here.)
- Xero - Frittalary
- Font of your choice (I used Yummah Strawberriez)
Let's start:
- Open a new canvas 550x360px.
- Choose two matching colours as foreground and background colour.
- Copy and paste your stamp frame and resize it if necessary.
- With your magic wand click inside of the first frame.
Expand the selection about 4 px and add a new raster layer.
Fill this layer with your first colour.
Aplly Xero - Fritilliary with the standar settings.
Selection none.
Move this layer under the frame layer.
- Repeat the above mentioned step with the other frame but this time you've to use your second colour.
- Merge the two colour rectangles.
- Copy and paste the glitter-heart-string and move it in the middle of the frames.
Erase these parts which are looking through. Add a small dropshadow.
- Highlight your frame layer and add a small dropshadow if necessary.
- Add your tube and move it to the right.
Resize and dropshadow it.
- Copy and paste the bow and arrange it on the tag.
(I added mine to the head of my tube)
Dropshadow.
- Copy and paste flowers (or whatever your using) and move them into the left frame.
Erase the parts which are looking over the border below.
Dropshadow it.
- Copy and paste the ladybug, resize and dropshadow it.
Arrange it on your tag.
- If you want you can decorate your tag with other elements.
- Choose your front and a matching colour and add your text and/or name.
Give it a small dropshadow.
- At least just add copyright and/or watermark infos and save as.


