This tutorial was written by and copyrighted to Seven on 20th February 2010.
For this tutorial you will need:
-Fantasy-kit from Polka Dot Scraps which you can get here
- A tube of your choice (I used one of the fairies which came with the kit. They are from Lisa K.)
- Mask of choice (I used WSL_Mask220 which you can get here)
- Font of your choice (I used 2Peas THINK PINK)
Let's begin:
- Open a new canvas 550x550px.
- Copy and paste a paper of your choice and apply the mask.
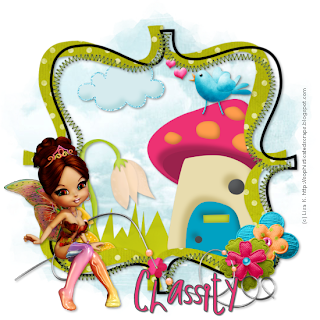
- Copy and paste frame-4 and resize it.
- With your magic wand click inside of your frame, so that everything in the big green one is selected. Expand the selection about one px.
- Copy and paste the cloudy paper (paper1) and move it under your frame layer.
Invert the selection and press delete.
- Add a dropshadow to your frame.
- Highlight the paper layer.
- Copy and paste element8 (grass) resize and dropshadow it.
Arrange it a bit to the bottom and erase the parts which are looking through the frame.
- Copy and paste the house (element5) move to to the left.
Resize and add a dropshadow.
Erase the party which are looking through the frame.
- Copy and paste other elements like mushrooms, flowers, clouds, birds etc. and decorate your "picture with it"
- Highlight your frame layer.
- Copy and paste element21 (flower), resize and dropshadow it.
Arrange it on the right side of your frame.
- Copy and paste element20 (flower), resize and dropshadow it.
Arrange it to the right side a little bit over element21.
- Copy and paste element15, resize and dropshadow it.
Move it to the bottom.
- Copy and paste your tube and resize it if necessary.
Move it to the left of your frame and add dropshadow.
- Choose a darker foreground and a lighter/brighter background colour and write your name.
Dropshadow it.
- At least just add copryight infos and/or watermark and save as.


