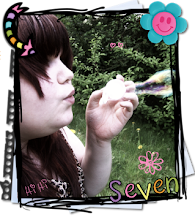
This tutorial was written by and copyrighted to Seven on 06th September 2009
For this tutorial you will need:
- Bea's Stargazer -kit which you can get here
- 1 lying-tube of your choice (I used the fabulous art of Zindy Nielsen, which you can buy at her own shop.)
- Mask of your choice (I used WSL_Mask297 which you canget here)
- Eye-Candy 4000 - radient Glow (optional)
- Font of your choice
Let's start:
- Open a new canvas 600x450px and will it with white.
- Copy and paste a paper of your choice and use the mask on it.
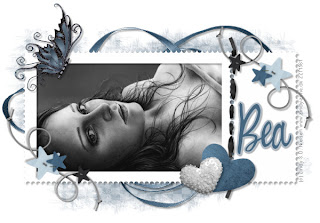
- Copy and paste the stamp-frame (frame1), resize and click with your magic-wand inside of it.
- Expand the selection about 3px
- Copy and paste a paper, resize a bit and move it under the frame layer.
- Invert the selection and press your delete button. Invert the selection again.
- Copy and paste your tube, move it under the frame, resize it, invert the selection and press delete. Selection none. Add a small dropshadow to your tube and your frame.
- Copy and paste a ribbon (ribbon1 or ribbon2) and move it under the paper layer. Dropshadow it.
- Copy and paste the element star5, resize it and add a dropshadow. Move it to the right edge above. Duplicate it and mirror it horizontal and vertical.
- Copy and paste the stitching (stitche), rotate it about 90 degrees and add a dropshadow. Arrange it on the "dotted line" of your frame.
- Copy and paste a paper-heart, resize and dropshadow it and move it on the lower side in the middle of the frame.
- Copy and paste the heart-element heart3, rasize and dropshadow it and move it a little bit over the paper heart.
- Copy and paste a butterfly (butterfly2), resize and mirror it. Add a dropshadow and postion it on the left edge of your frame.
- Write your name on your tagand add a gradient glow. Give it a small dropshadow.
- Add Copyright-Infos and/or watermark and save as.


