This tutorial was written by and copyrighted to Seven on 15th October 2009
For this tutorial you will need:
- Sabs' Hope is forever -kit, which you can download here.
- 1 picture/painture of your choice (I used the fabulous work of Suzanne Woolcott. You can purchase her stuff here.)
- Font of your choice (I used A&S BlackSwan)
Let's get ready!
- Open a new canvasn 550 x 550 px.
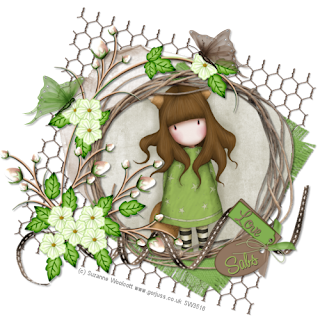
- Copy and paste the wire (element_03). Resize it and rotate it a bit. Add a small dropshadow.
- Copy and paste frame_07 and resize it a bit. With your magic wand or selection tool select the inner side of the frame.
- Copy and paste your picture move this layer under the frame layer and postion it into the frame. Invert the selection and press delete.
- Add a dropshadow to your frame.
- Copy and paste one of the paper circles (element_20 or _21), resize it and move this layer under the frame and picture layer. Postion it to the left higher side and add a dropshadow.
- Copy and paste one of the mats (element_06 or _07), resize and rotate it a bit. Move this layer to the right lower side and dropshadow it.
- Highlight your frame layer.
- Copy and paste a ribbon (element_04 or _05), resize it and move to the ground of your frame. Add a dropshadow.
- Copy and paste the big flower (element_35), resize and dropshadow it. Postion it to the left side of your wire and frame.
- Copy and paste yoour tag (element_40), resize and rotate it a bit and move it to the right side over your ribbon. Don't forget the dropshadow.
- Write your name and/or text on it and give it a small dropshadow.
- Copy and paste the butterflies (element_33 and _34) resize and decorate your tag with them. Add a dropshadow.
- At least just add copyright and/or watermark and save as.
Ready ♥


