Montag, 22. Februar 2010

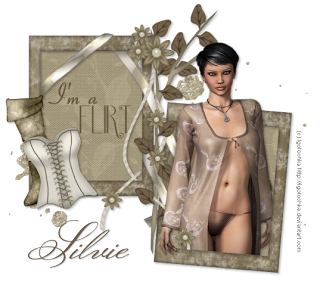
Flirt


This tutorial was written by and copyrighted to Seven on 22nd February 2010


For this tutorial you will need:

- Show Must Go On kit from Cadi's Fun Scraps which you can download here
- a tube of your choice - I am using the beautiful artwork of Igolochka
- Flirt brush or wordart of choice ( I don't knnow where I got mine, so I cannot supply)
- Font of your choice (I used Monsieur La Doulaise)


Let's get ready!


- Open a new canvas 550x550px.

- Copy and paste Frame09 and resize it.

- With the magic wand click inside of the frames and expand the selection about 3.

- Copy and paste a paper of your choice.
Invert the selection and press delete.
Selection none.
Move this layer under your frame layer.

- Copy and paste a glitter of your choice and resize it.
Move it under the frame and paper layer.

- Highlight your frame layer and dropshadow it.

- Copy and paste your tube, resize and dropshadow it.
Arrange it in the right frame and erase the body parts which are looking throught the frame boarder.
(see my tage above for help)

- Add your brush or wordart in the left frame.

- Copy and paste a boot of your choice.
Resize and dropshadow it.
Arrange it on the left side of your left frame.

- Copy and paste a corset and resize it.
Rotate it a bit and arrange it over your boot on the left side.
Add a dropshadow.

- Choose a matching background colour and your font and write your name.
Add a small dropshadow to it.

- At least just add copyright info and/or watermark and save as.


This was a quicky!

Samstag, 20. Februar 2010

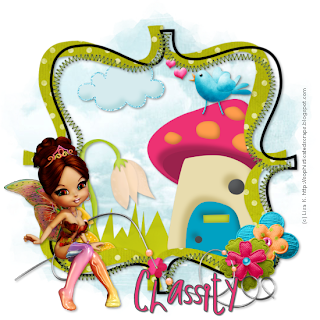
Fantasy


This tutorial was written by and copyrighted to Seven on 20th February 2010.


For this tutorial you will need:

-Fantasy-kit from Polka Dot Scraps which you can get here
- A tube of your choice (I used one of the fairies which came with the kit. They are from Lisa K.)
- Mask of choice (I used WSL_Mask220 which you can get here)
- Font of your choice (I used 2Peas THINK PINK)


Let's begin:


- Open a new canvas 550x550px.

- Copy and paste a paper of your choice and apply the mask.

- Copy and paste frame-4 and resize it.

- With your magic wand click inside of your frame, so that everything in the big green one is selected. Expand the selection about one px.

- Copy and paste the cloudy paper (paper1) and move it under your frame layer.
Invert the selection and press delete.

- Add a dropshadow to your frame.

- Highlight the paper layer.

- Copy and paste element8 (grass) resize and dropshadow it.
Arrange it a bit to the bottom and erase the parts which are looking through the frame.

- Copy and paste the house (element5) move to to the left.
Resize and add a dropshadow.
Erase the party which are looking through the frame.

- Copy and paste other elements like mushrooms, flowers, clouds, birds etc. and decorate your "picture with it"

- Highlight your frame layer.

- Copy and paste element21 (flower), resize and dropshadow it.
Arrange it on the right side of your frame.

- Copy and paste element20 (flower), resize and dropshadow it.
Arrange it to the right side a little bit over element21.

- Copy and paste element15, resize and dropshadow it.
Move it to the bottom.

- Copy and paste your tube and resize it if necessary.
Move it to the left of your frame and add dropshadow.

- Choose a darker foreground and a lighter/brighter background colour and write your name.
Dropshadow it.

- At least just add copryight infos and/or watermark and save as.

Samstag, 13. Februar 2010

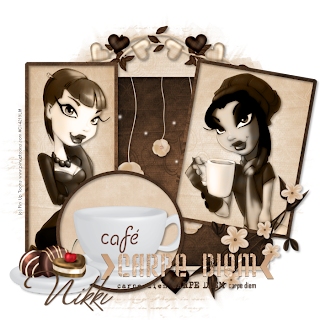
Carpe Diem


This tutorial was written by and copyrighted to Seven on 13th February 2010.


For this tutorial you will need:

- Creative Intentionz' Scrapkit "Dip Me In Choclate", which you can purchase here
- 2 Tubes of your choice. I used the fabulos work of Rion Vernon alias Pin Up Toons which you can purchase at C.I.L.M
- "Carpe Diem" Template von Tammy which you can get here
- Mask of choice (I used WSL_Mask226 which you can get here)
- a font of your choice (Monika)
- Xero - Radiance


Let's begin:

- Open the template and duplicate it with CTRL+D.
You can close the the original one.

- Delete the following layers (inclusive the shadowed ones):
"Raster17, 15, 12, 11"

- Copy and paste a paper of your choice.
Move it to the bottom.
Apply you mask.

- Highlight your mask layer.
Copy and paste HeartWreath 1 or 2 and add a small dropshadow.

- Highlight the right rectangle (Raster2).
Selections - all - free - not free
Delete this layer and add a new one.
Copy a light paper and paste it into selection.
Selection - frame selection - both sides - 4 px
Add a new raster layer and copy a darker paper.
Paste it into the selection.
Selection none.
Add a dropshadow to the frame.

- Repeat the above mentioned step with the left rectangle (Raster5), with the middle one (Raster6) and with the circle (Raster3).
In the middle one paste a darker one in the rectangle and a lighter one for the frame.

- Highlight Raster6.
Selections - all- free - not free
Copy and paste Dangler and resize it.
Selections - invert.
Hit delete.
Selections - none.
Dropshadow your dangler.

- Highlight Raster 5
Selections - all - free - not free
Copy and paste your tube.
Selections - invert and push delete.
Selection - none.
Apply Xero - Radiance with the standard settings to your tube and add a dropshadow.
Change it to luminance (legacy).

- Highlight Raster 2 and repeat the step above.
Copy and paste your second tube.

- Highlight Raster 3.
Selections - all - free - not free
Copy and paste CafeCup and arrange it
Selections - invert and push delete.
Selection - none.
Add a dropshadow.

- Highlight the wordart (Raster13) and colorize it that is matches to your tag.
Add a small dropshadow.

- Copy and paste a VineFlower, resize and dropshadow it.
Arrange it to the left side under your wording.

- Copy and paste Choclate Plate and arrange it to the right.
Resize and dropshadow it.

- If you want you can decorate your tag with some of the other beautiful elements.

- Choose a matching color and your font and write your name.
Add a small dropshadow.

- At least just add copyright info and/or watermark and save as.


Puh, we're ready!

Mittwoch, 10. Februar 2010

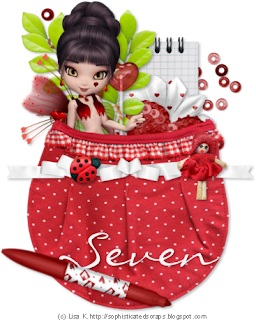
Fairy In My Pocket


This tutorial was written by and copyrighted to Seven on 10th February 2010.


For this tutorial you will need:

- My PTU-kit Saranghe which you can purchase here or here
- A fairy tube of your choice (I used the tube which came with the kit. It's a stunning poser from Lisa K.)
- font of your choice (I used Liorah BT)


Let's start:

- Open a new canvas size 500 x 500 px.
You can resize it later.

- Copy and paste the bag (bag_01), resize it and add a nice dropshadow.

- Copy and paste the beads, resize and dropshadow them and move them under the bag layer.

- Copy and paste the notelock, resize and dropshadow it.
Arrange it.

- Copy and paste a leave, resize and dropshadow it.
Move it to the left.

- Copy and paste flower or heart elements and arrange them.
Don' forget to resize and dropshadow it.

- Highlight the leaf-layer and copy and paste a lollipop.
Resize and add a dropshadow.

- Copy and paste your fairy tube.
Resize it and dropshadow.
Arrange it to a matching place "in" your bag.

-Highlight your bag layer
Make sure that all the elements and fairy are covered by the bag.

- Copy and paste a ribbon (ribbon02) and resize it.
Arrange it over your bag and dropshadow it.

- Copy and paste the doll and the ladybug or other elements.
Resize and dropshadow them.
Arrange them over your bag and ribbon.

- Copy and paste the marker and resize it.
Move it a little bit of the lower part of the bag.
Rotate it and drophadow it a bit.

- Set a matching background color and choose your font.
Write your name and add a dropshadow.

- At least just add copyright infos and/or watermark and save as.

This was easy, or?


Samstag, 6. Februar 2010

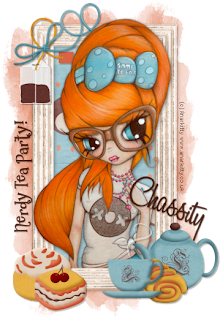
Nerdy Tea Party


This tutorial was written by and copyrighted to Seven on 06th February 2010

For this tutorial you will need:

- Chassity's FTU-kit Tea Time which you can download here
- A tube of your choice (I used a cool tube of Anarkitty)
- Mask of choice (I used WSL_Mask254 which you can get here)
- two fonts of your choice (I used 2Peas Mr Giggles and A&S Black Swan)


Let's start:

- Open a new canvas 550x550 px.
You can resize it later.

- Copy and paste a paper of your choice and apply the mask.
(I made mine a bit smaller after I added the frame.)

- Copy and paste a frame (frame-12, 13, 14, 15 or 16) resize it and rotate it about 90 degrees.

- With your magic wand click inside the frame and expand the selections about 5.

- Copy and paste a paper of your choice, move it under the frame layer and invert the selection.
Press delete.
Selection none.

- Highlight your frame layer and dropshadow it.

- Copy and paste your tube, resize it and move it in the middle of your frame.
Erase parts of the body which are looking over the boarder below.
Dropshadow your tube.

- Copy and paste coffee pot, coffee cup and the cakes.
Resize and dropshadow them.
Arrange them on your tag.

- Copy and paste a tea bag, resize and dropshadow it.
Move it to the left higher corner.

- Copy and paste a bow of your choice.
Resize and dropshadow it.
Move it to the left ver your tea bag.

- Choose a matching background colour and your font.
Write your text (Nerdy Tea Party) and rotate it about 90 degrees.
Add a small dropshadow and position it near your frame.

- Choose your second font and write your name.
Dropshadow i and arrange it.

- At least add copyright infos and/or watermark and save as.


Pretty easy, or?

TOU

All tutorials are written by myself and any resemblance to any other tutorial is purely coincidental.
You are allowed to make tags, stats, layout what ever your want with them.
You are not allowed to make any monetary gain with them.
You are not allowed to hotlink.
I do not allow to translate it whithout my written permission!


It would be great if you mail me your results at coroners.sun@gmail.com

  © Blogger template Ramadhan Al-Mubarak by Ourblogtemplates.com 2008

Back to TOP