Samstag, 30. Januar 2010

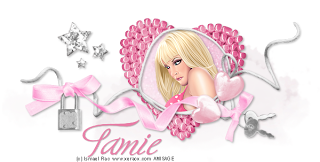
Tamie's Valentine


This tutorial was written by and copyrighted to Seven on 30th January 2010.


For this tutorial you will need:

-Cupid-kit from Addictive Pleasures which you can get here
- A tube of your choice (I used a fabulous tube of Ismael Rac which you can purchase at AMI)
- Font of your choice (I used Ministry Script Stylistic HFF)


Let's begin:


- Open a new canvas 600 x 400px.

- Copy and paste ele58 and resize it if necessary.

- With your magic wand click inside of the circle and expand the selection about 2.

- Copy and paste a paper of your choice.
Invert the selection and hit delete button.
Invert again.

- Copy and paste the tube of your choice, resize if necessary and arrange the face (or whatever part you like) in the the center of the circle.
Invert the selection and press the delete button.
Selection none.

- Add a small dropshadow to your tube and ribbon-frame-layer.
Merge these 3 layers visible.

- Copy and paste the cloud (ele63) and move it under your frame-layer.
Resize it a bit.

- Copy and paste a heart (ele9) and resize it if necessary.
Move this heart under the circle of your ribbon-frame.
Add a dropshadow.

- Copy and paste the glitter stars (ele44).
Resize and dropshadow them.
Move it a bit to the left.

- Highlight your ribbon layer

- Copy and paste ele88, resize and dropshadow it.
Arrange it on your ribbon, that every knot of the bows is touching the string from the frame.

- Copy and paste the glass hearts (ele25), resize and dropshadow them.
Arrange them to the right a little bit over the bow of the frame.

- Choose a nice maching colour and font and write your name.

- At least just add Copyright and watermark infos and save as.

Ready ♥

Violet Rock


his tutorial was written by and copyrighted to Seven on 30th January 2010.


For this tutorial you will need:

-Unlikely Ballad-kit from Polka Dot Scraps which you can get here
- A tube of your choice (I used a fabulous tube of Ismael Rac which you can purchase at AMI)
- PlugIn Xero - Radiance
- Mask of choice (I used WSL_Mask208 which you can get here)
- Font of your choice (I used HawaiiLover)

Let's begin:

- Open a new canvas 600x600 px.

- Copy and paste frame02 and resize it.

- With your magic wand click inside of the frame and expand the selections about 5px.

- Copy and paste a paper of your choice.
Invert the selection and press delete.
Invert the selection again.

- Move this layer under the frame layer.

- Copy and paste your tube and arrange it in the frame.
Selection invert and press delete.
Selection none.

- Apply the Xero Radiance Plugin with the standard settings

- Change the opacity of your tube on luminance (legacy).

- Merge these 3 layers and add a dropshadow.

- Copy and paste another paper of your choice.
Move it below your picture layer and apply the mask.

- Copy and paste element19 and resize it.
Move it a bit to the top and add adropshadow.

- Duplicate this layer and mirror it horizontal.
Merge the two element layer and duplicate it again.
Rotate it about 90 degrees.

- Copy and paste element23, resize and dropshadow it.

- Highlight your frame/picture layer.

- Copy and paste element46, arange it and resize it if necessary.

- Copy and paste element16, resize and dropshadow it.
Mirror it and move it to the left side of your picture.
I also coloured it violet.

- Copy and paste element25 and resize it.
Move it to the boarder of your frame and add a small dropshadow.

- Copy and paste your tube and resize it if necessary.
Move it to the right side of your frame/picture.
Add a dropshadow.

- Choose black as foreground and a maching colour as background colour and write your name.
Add a small dropshadow.

- At least just add copyright infos and/or watermark and save as.

Sonntag, 24. Januar 2010

Pink Valentine


This tutorial was written by and copyrighted to Seven on 24th January 2010.


For this tutorial you will need:

-Always in Love-kit from Bea Creations which you can get at Twilight Scraps
(It's her part of the january store collab kit)
- A tube of your choice (I used a fabulous tube of Ismael Rac which you can purchase at AMI)
Mask of choice (I used WSL_Mask208 which you can get here)
- Font of your choice (I used Dr.Crabfeld)


Let's start:

- Open a new canvas 550x550px.

- Copy and paste a paper of your choice and apply the mask.

- Copy and paste the rose-heart-frame (frame04) and resize it.

- With your magice wand click inside the center of your frame and expand the selection about 5px.

- Copy and paste another paper of your choice.
Move it under the frame layer.

- Invert the selection and press delete.
Invert the selection again.

- Copy and paste the glitterrain (deco04) and arrange it in your frame.
Selection invert and press delete.
Selection none.
Add a small dropshadow to your glitter.

- Dropshadow your frame.

- Copy and paste bling02 and move it under the paper layer.
Duplicate it 3 times (you should have 4 blings now) and arrange them for your liking.
Add a small dropshadow.

- Copy and paste your tube, resize and dropshadow it.
Arrange it in your frame.
Erase parts of the body which are looking over the frame.
(see my tag for help)

- Copy and paste the doves with heart (dovewithheart01), resize and dropshadow it.
Move it to the cusp of your heart.

- Copy and paste a butterfly (butterfly05) resize and rotate it abit.
Arrange it on your frame and add a dropshadow.

- Copy and paste the bow with the bell (heart05) and resize it.
Move it to the right middle boarder of your heart-frame.
Add a small dropshadow.

- Duplicate this layer and mirror it.

- Add your name to the tag.

- At least just add copyright infos and/or watermark and save as.


Samstag, 9. Januar 2010

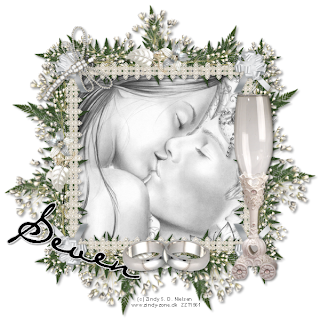
I Do


This tutorial was written by and copyrighted to Seven on 09th January 2010


For this tutorial you will need:

- Design by Ali's I DO -kit which you can get here
- 1 couple-tube of your choice (I used the fabulous art of Zindy Nielsen, which you can buy at her own shop.)
- Font of your choice (I used Diva)


Let's start!

- Open a new canvas 600x600 px.

- Copy and paste Frame3, resize it and add a soft dropshadow.

- Copy and paste Frame2 and resize it.

- With your magic tool click inside of the frame and expand the selection about 7 px.

- Copy and paste a paper of your choice.
Invert the selection and press delete.

- Invert selection again.

- Copy and paste your tube and move it in the middle of your frame.
Invert the selection and press delete.

- Selection none

- Move the paper and tube layer under the frame2 layer.

- Add a soft dropshadow to your frame.

- Copy and paste Silver Wedding Band 2 (ring) and roate it about 90 degrees.
Resize it.

- Duplicate this layer and mirror it.

- Postion the two rings in the middle of your frame border.
Merge them together and add a dropshadow.

- Now you can decorate your tag as you wish or like I do:

- Copy and paste the Crystal Dragonfly, resize it and roate it a bit.
Move it to the left upper edge and add a small dropshadow.

- Copy and paste the Wedding Glas1, resize and position it to the right side.
Dropshadow it softly.

- Choose a lighter forground colour, a darker background colour and your font and add your name or text.

- Dropshadow it softly.

- At least just add copyright information and/or watermark and save as.

Ready!


Sonntag, 3. Januar 2010

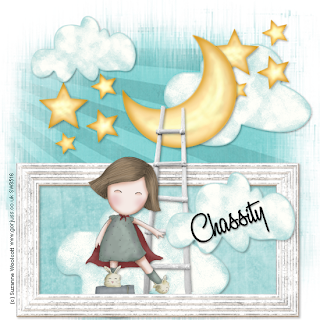
Let's visit the Moon


This tutorial was written by and copyrighted to Seven on 03rd January 2009


For this tutorial you will need:

- Chassity's Starry Night-kit, which you can get exclusively here.
- A tube of your choice (I used the fabulous work of Suzanne Woolcott. You can purchase her stuff here.)
- Mask of choice (I used WSL_Mask39 which you can get here)
- Font of your choice (I used A&S Black Swan)


Let's start:

- Open a new canvas 550x550 px

- Copy and paste a paper of your choice and apply the mask.
(I enlarged the mask about 115%)
Reduce the oppacity a bit.

- Copy and paste frame5, resize and move it to the ground.

- With your magic wand click inside of the frame and expand the selection about 5.

- Copy and paste a paper of your choice, invert the selection and press delete.
Selection none.
Move this layer under the frame layer.

- Highlight your frame layer.
Dropshadow it.

- Copy and paste the clouds (element1 & element2).
Resize them, duplicate them and decorate your tag with them.
I used two in the "sky" (the part over your frame), one in the frame and one over the frame.

- Copy and paste the stars (element43), resize it an duplicate it.
Arrange them in the "sky" and add a dropshadow.

- Copy and paste the moon (element44) and resize it.
Mirror it and rotate it a bit.
Dropshadow it.

- Copy and paste the ladder (element7), resize and dropshadow it.
Arrange it in the middle of your tag.
The bottom part shoul touch the frame and the higher part should touch the moon.

- Copy and paste your tube, resize and dropshadow it.
Postion it in front of the ladder.

- Choose your font and write your name on one of the cloud.
Add a dropshadow.

- At least just add copyright and/or watermark and save as.

Ready!


TOU

All tutorials are written by myself and any resemblance to any other tutorial is purely coincidental.
You are allowed to make tags, stats, layout what ever your want with them.
You are not allowed to make any monetary gain with them.
You are not allowed to hotlink.
I do not allow to translate it whithout my written permission!


It would be great if you mail me your results at coroners.sun@gmail.com

  © Blogger template Ramadhan Al-Mubarak by Ourblogtemplates.com 2008

Back to TOP